This post was originally published in 2009
The tips and techniques explained may be outdated.
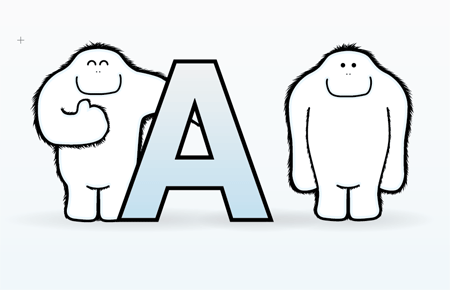
I recently had the opportunity to work with fellow design blogger Chris Coyier of CSS-Tricks as part of a little project to produce a cartoon monster mascot for the newly launched service; Are My Sites Up. The challenge was to create a monster character that could become part of the Are My Sites Up branding, during the process I took the time to document each step of the project in order to present The Making of Abe, The Are My Sites Up Mascot.
Are My Sites Up is an indispensable resource for all website owners, the service does exactly what it says – informs you of any unexpected downtime your websites might be experiencing. With free and premium accounts with plenty of features it’s definitely worth checking out.
Chris dropped me an email outlining the plans behind the character, stating that they were looking for a loveable monster mascot that could put people in a good mood, even when giving out the bad news of website downtime. It was also mentioned about having the character chilling out, implying that he doesn’t have to worry because the service is doing his job.
Combining the idea of loveable monsters and a slant on the word ‘chill’ I decided to base the design on a Yeti. After all, who doesn’t love Yetis?!
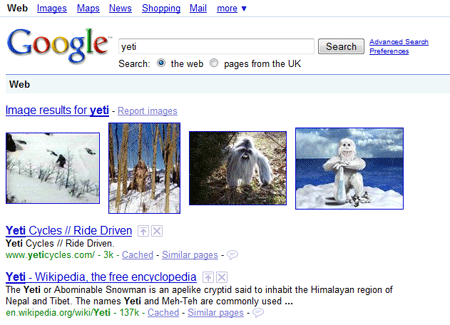
I fired up Google to start the project research, gaining some idea on how Yetis are depicted and what key features could be focused on.
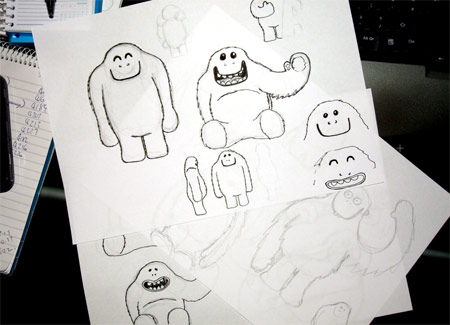
The next stage was to sketch out the initial ideas on paper, roughing out a few variations of size and body shape while making Chewbacca noises to myself to gain a feel of his personality.
The overall form of the character was developed until I was happy with the direction he was taking. A few scans were taken into Adobe Illustrator for reproducing the character digitally.
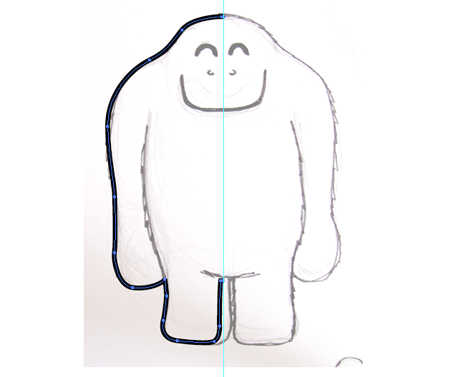
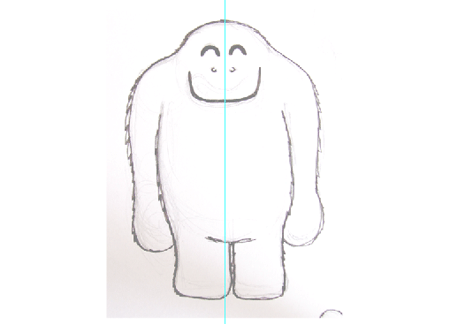
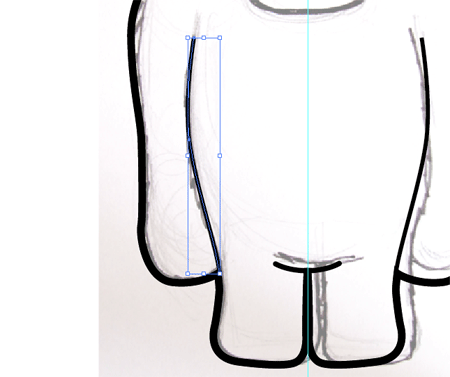
Using the Pen Tool, the outline of the character was traced with a thick black line. Being a front facing angle, just half of the character was drawn to produce a symmetrical body shape.
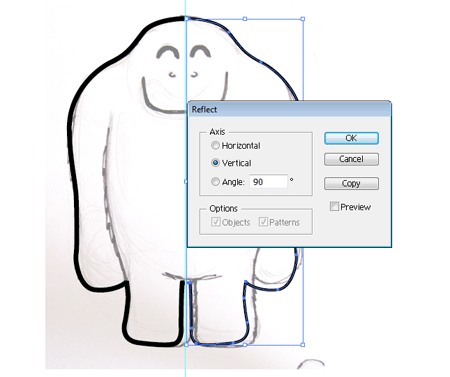
The path was copied and pasted, then flipped and positioned on the opposite side.
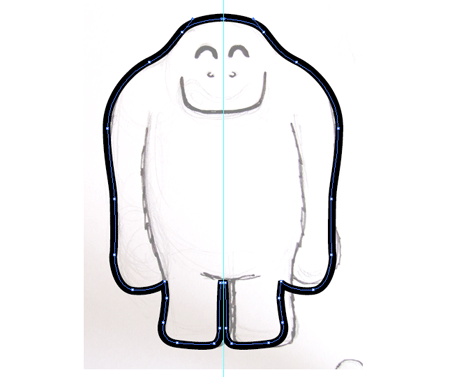
To complete the two separate halves, the open points at the top and bottom were joined together with the CTRL / CMD J command.
The finer details were then traced with a thinner stroke, being quite a simple character only a few additional lines were needed, which helped the character work well at small scales.
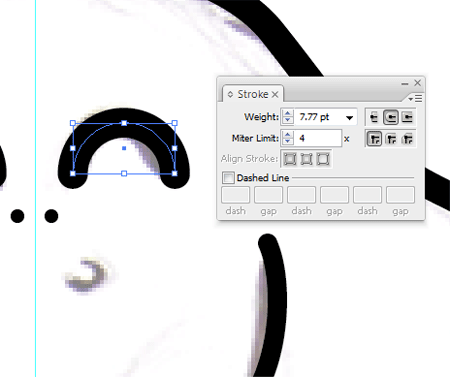
The facial features were then created using a mixture of hand drawn elements and manipulation of the basic shapes available in Illustrator.
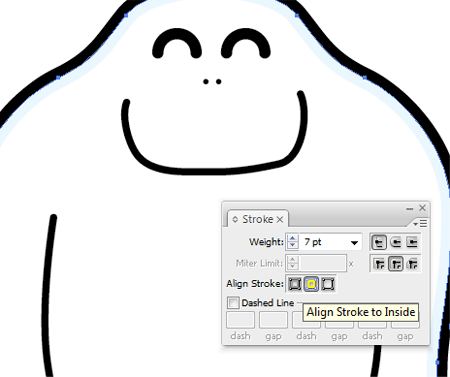
Long time readers may recognise the outlining technique from my previous character design tutorials. Adding a complementing inner stroke helps add depth and dimension to the otherwise flat design.

Being a ‘chilled’, snow inspired colour scheme a very light cyan was used against the white, while the black outline helps give strong definition.
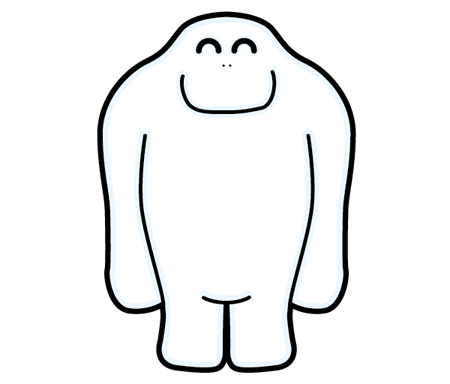
The main character body form was then complete, but no Yeti is complete without a coat of long fur!
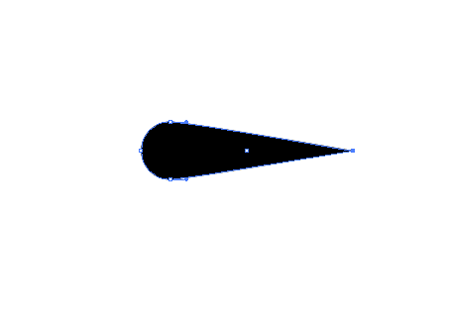
A simple custom brush was created to represent a single hair. Originally based on a tiny circle an end point was then dragged out and Bezier curves removed with the Convert Anchoir Point tool.
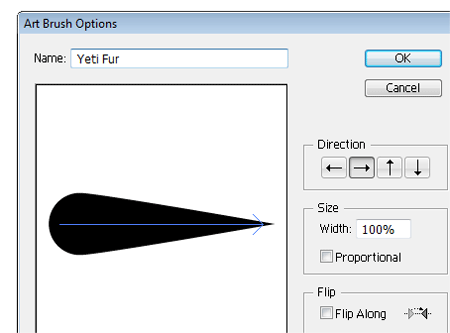
The shape was then transformed into an Art Brush using the Brushes palette, ensuring the orientation of the brush was correct.
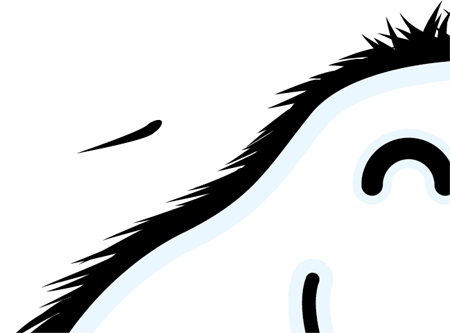
Assisted with a Wacom graphics tablet, a large number of short brush strokes were made, spanning from the body of the character outwards.
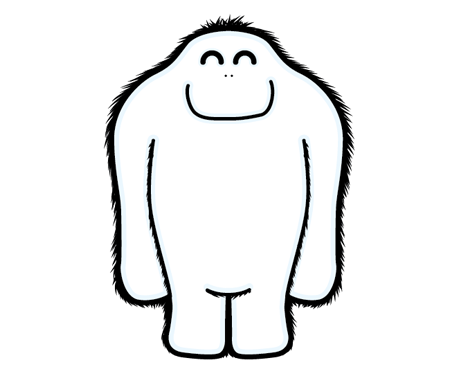
As the number of individual hairs increased, so did the impression of fur, until the whole outline of the body was covered.
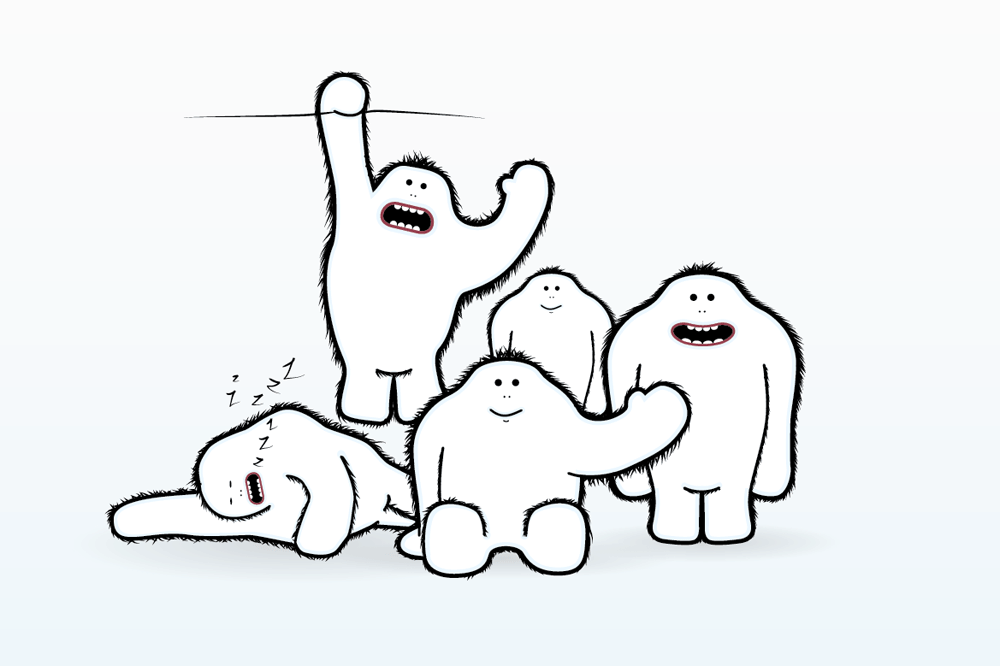
The same process was repeated to create a second example of a potential pose the character could be displayed in.
The character concept was emailed over to Chris, and a reply was soon received. Chris was happy with the style of the Yeti, and decided to call him Abe!
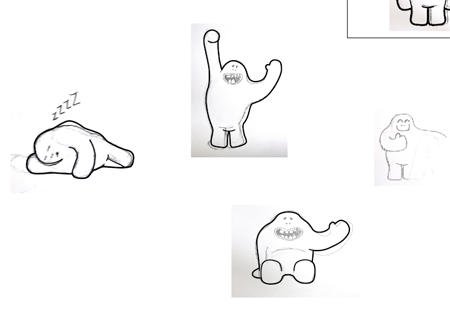
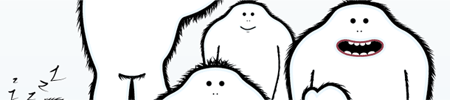
The main idea for the mascot was to appear in various places around the Are My Sites Up website, so a few poses were sketched out of Abe hanging around.
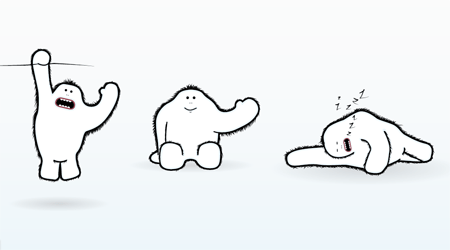
Following the same overall process, each individual pose was also digitally produced.
This brought the project to a close, the various poses were sent over to Chris as EPS files to allow for reproduction at any size. Overall it was a pleasure to work with Chris and great fun creating the mascot. Don’t forget to check him out along with the fantastic service offered over at Are My Sites Up.
This is a great article Chris! I really enjoy your articles on how you go about illustrating a sketch; probably because I have little experience doing this myself.
BTW: You’ve missed an “h” in the URL for AreMySitesUp to start the paragraph. Keep up the great work!
Thanks for spotting that Deron, quickly went over and fixed it.
Glad to hear you enjoyed the article, I’ll be sure to look into writing more around the topic of sketch-to-illustration if it helps out.
Yeah I would definitely enjoy that, Chris. That’s for the consideration. Looking forward to your future articles.
Isn’t it weird that everything i go on u seem to have left a coment before me! What kinda a sh_t is that
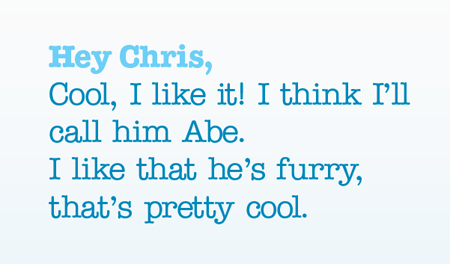
Hey Chris,
It was a pleasure working with you! Abe is great. If you check out CSS-Tricks right now, you’ll see him hanging out there too =)
The simplicity is great, it makes him adaptable and easy to use for a variety of applications. It’s also nice to have in a variety of poses, which gives him depth and personality.
Thanks Chris, Abe looks like he’s having fun hanging around on CSS-Tricks, great idea having him breaking beyond the limitations of the banner dimensions!
Great! Thanks for sharing your process. I am definitely learning a lot form your blog over the past few months. I like the idea for the AreMySitesUp as well.
God bless.
David.
http://www.stopdropanddesign.
I love it! He is cute and lovable…a great mascot. I liked the blue stroke addition a lot.
Thankyou Kate, I find a simple inner stroke works wonders for adding a little depth to character designs.
Nice job Chris – Didn’t know you created that mascot. Looks really nice! The “fur” had to be a crazy job of creating, but it’s what finished Abe.
Keep up the good work!
Thanks Marco, the fur was a little exhaustive, but was made a lot easier with the use of a pen tablet!
Love the character design Chris.
Thanks for sharing your workflow with us.
Awesome mascot. He looks really friendly and has lots of charisma. How long did it take to finish this guy?
Thanks, I like your articles.Your abe is great
wow, very nice.
love to see other design\developers work process
cracking mascot to boot! :)
Hey.., so cute looking mascot.. :)
Monster Love <3 haha.
Cool Yeti! I guess you’ll be using that website then from past problems Chris.
Very cool little, Chris.
I must say I commend your efforts for doing each little piece of hair, regardless if you used a tablet or not.
Great character and great article. The attention to detail with the fur is excellent. – Checking out the are my sites up website now.
Great work! Websites are always better with mascots :)
Arf, guess I need to get a mascot now :(
That’s awesome, exactly the type of thing i love, really subtle but with an amazing end result.
This is a great tutorial and Abe is def a dope lil character.
I always wanted to illustrate some of my drawings, this will be a good starter tut for me. Thanks Chris!
Wow, there’s way too much ‘Chris’ in this post – got very confusted for a couple of minutes till the penny dropped! Great account of the illustration process though, I too would like to see more of this in the future :)
Love that you got into a Chewbacca zone to handle your task ;) #welldone
Top notch Chris! Fit article about a fun little guy named Abe. I did expect another Abe and was pleasantly surprised with your Abe, this Abe.
Best.
Lovable cartoon mascots are so fun. ;-)
I wish I had the gumption to tackle my own in Illustrator.
First off, thanks for writing such a detailed post Chris. I know that it takes a good chunk of time to put together posts like this, but I know myself and all of your other readers really appreciate it.
Secondly, the timing of this post was very interesting. I had come across “Are My Sites Up?” for the first time today, and in addition to being impressed with the service, Abe caught my eye on the homepage and the Premium sign-up page!
Very cool – I like him. Watching the design process it very interesting.
It’s great to see how fantastic and effective such a simple (with the exclusion of the fur!) illustration can be. It is so easy to forget that simple and/or subtle can be better in some instances – thanks for reminding me Chris!
Awesome, really great character. I couldn’t help noticing a yeti-sports image in the Google Image screenshot. I used to love those games.
damn this is crazy, I like it!@
http://rapidshareaza.com
LOL @ mascot! XD
Hehe, just kidding! Very nice, i like it, actually the entire process is pretty cool.
Thankyou for the kind comments everyone, glad to hear the walkthrough has helped a few of you out.
Hay there great tut, love the detail on the fur, I was wandering what the font was in the “hey chris…..” peace of text?
Makes me want to develop a little mascot for my company too! Fun tutorial, thanks for giving us a peak into your work flow!
Yetis for the win!
“… while making Chewbacca noises to myself to gain a feel of his personality.”
LOOOOL
btw: good tut.
Pretty nice tutorial! I’m very pleased i found your blog! :) Looking forward to your next articles!
Greetings
Jan