This post was originally published in 2007
The tips and techniques explained may be outdated.
The final monster cartoon character in the mini series; my favourite – the Green Slimey Monster! Once again, a tutorial that will hopefully be easy enough to follow by Illustrator beginners, with mostly the basic tools and shapes being used.

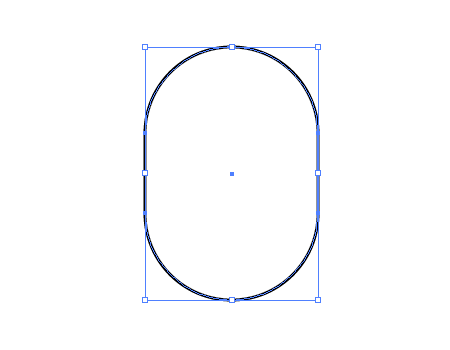
Launch Adobe Illustrator, and draw a Rounded Rectangle. Use the cursor keys before deselecting to give large rounded corners.
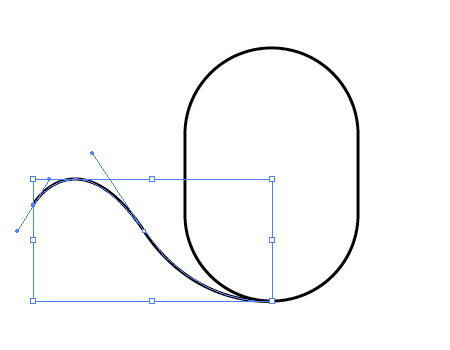
Use the Pen Tool to draw a tentacle, starting from the lower body and flowing outwards, avoid any sharp angles otherwise there will be kinks in the tentacles.
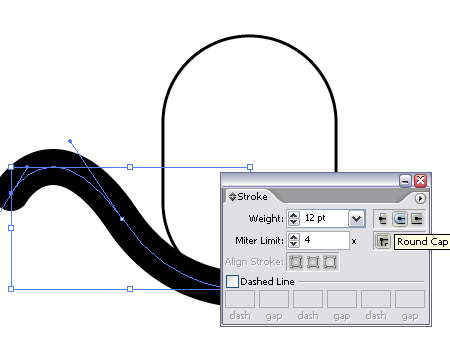
Add a really thick stroke to this path, and select the Round Cap option to give rounded eges.
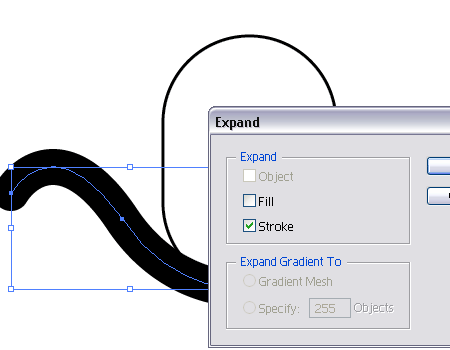
Convert this stroke into a shape by selecting the object and going to Obejct > Expand. De-check the Fill box leaving just the Stroke to be expanded.
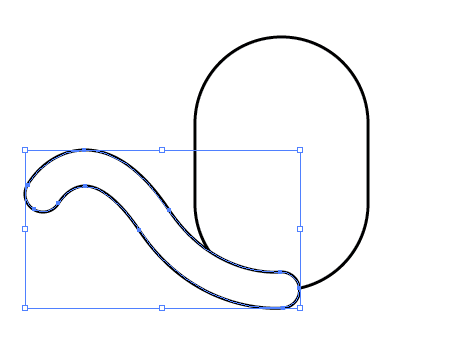
Change the black fill to a black outline to match the body for the time being.
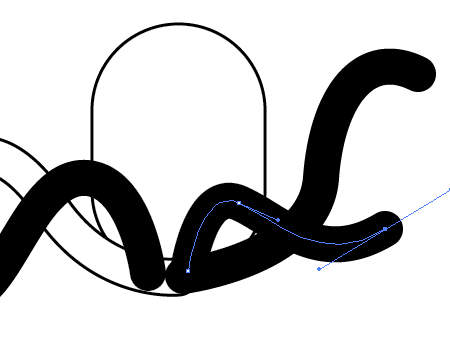
Back with the pen tool, draw three more tentacles in differing directions, all originating from roughly the same area of the body.
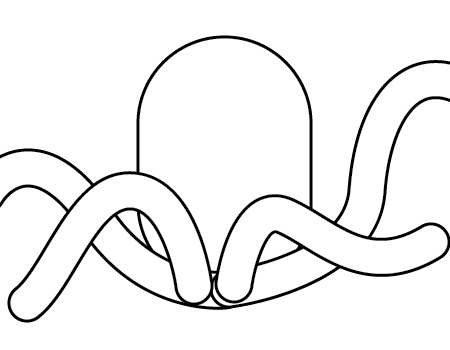
Expand these strokes and change the outline to match the body. Select the inner two tentacles and copy them before the next step.
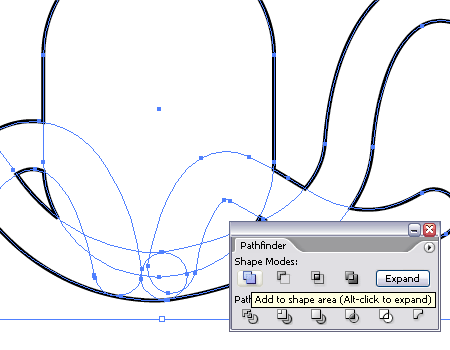
Select all five shapes and combine them with the Add To Shape Area Pathfinder Tool, click on the Expand button to reset the shape.
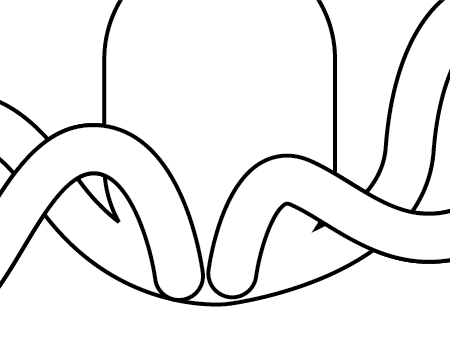
Paste back the tentacles we copied previously by pressing CTRL + F. This will allow us to keep some of the outlines to distinguish the tentacles from the body.
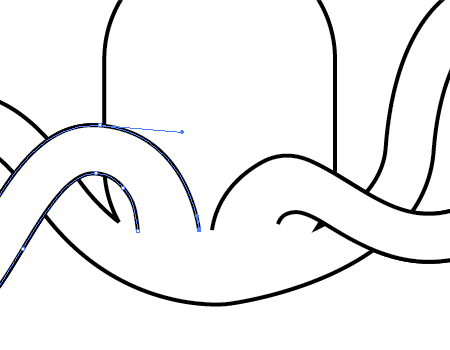
Use the Direct Selection Tool (White Arrow) to delete the lower most points on the tentacles, then move the other points into position further up the body as shown.

Draw a couple of eyes with black ovals from the Circle Tool.
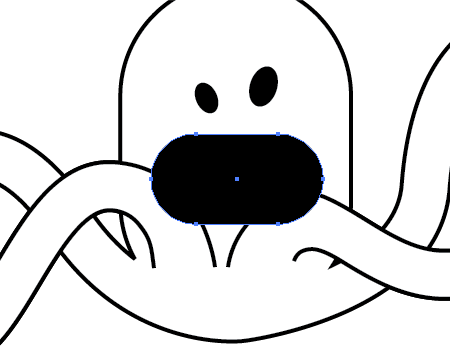
Use the Rounded Rectangle Tool to draw a huge, wide open mouth. Use CTRL + [ to alter the stack and position the mouth behind the tentacles.
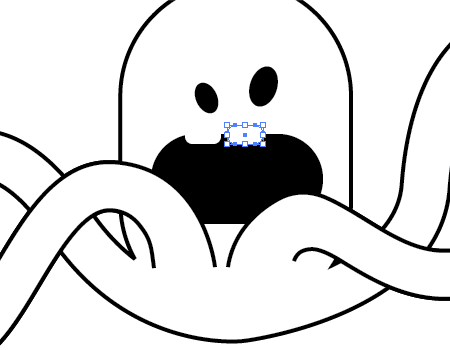
Back with the Rounded Rectangle tool draw in two white front teeth.
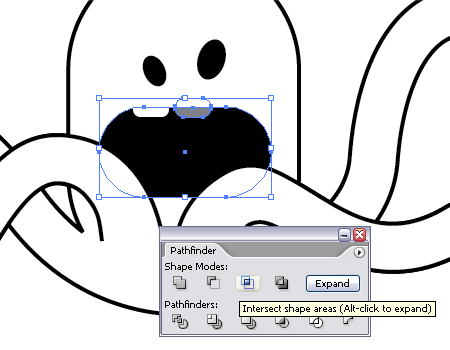
To delete any overlap from the teeth, copy the mouth shape and paste back into place (CTRL + F). Select this along with one of the teeth and use the Intersect Shape Areas Tool from the Pathfinder Window, click Expand and notice the tooth has been reduced to the outline of the mouth. Paste in the mouth shape again for use with pathfinding the second tooth.
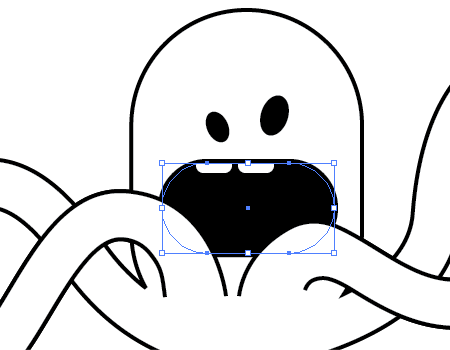
Add a thick black stroke aligned to the outside of the mouth.
Next up we'll create an Uvula (the dangly bit at the back of your mouth). Draw a red circle on the artboard to the side of the monster.
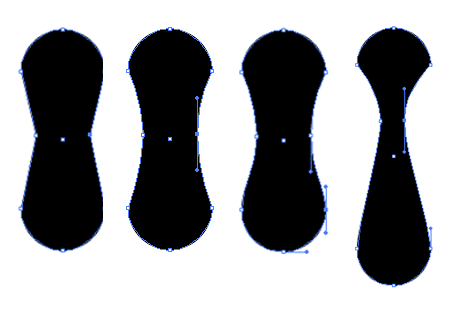
Draw a long vertical Rounded Rectangle, then use the Pen Tool to add a couple of points to the two long edges. Move these inwards with the Direct Selection Tool. Select the Pen Tool again, hold ALT whilst clicking and dragging each of these points to add Bezier Curves. Use the Pen Tool whilst holding ALT to alter the angles of the lower two points to give a smooth flowing line between them.
Select and drag the two middle points upwards and inwards to extend and further enhance the shape.
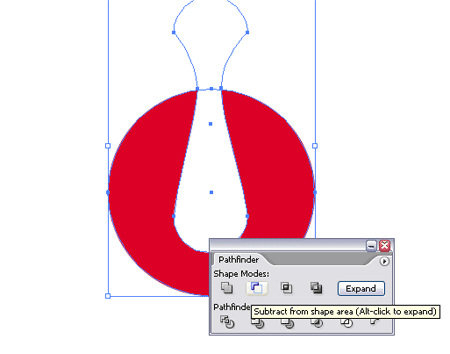
Centralise these two shapes and use the Substract From Shape Area option from the Pathfinder tool.
Fill the mouth with a deep red, then position the Uvula shape in black to the centre of the mouth.
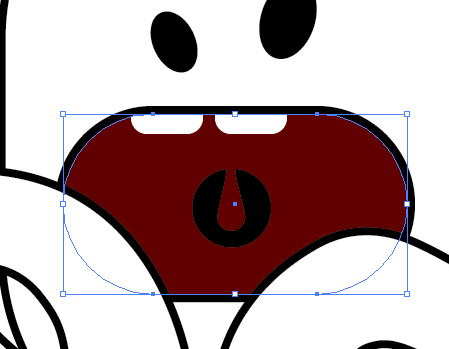
Go back to the Monster's body and thicken the stroke right up whilst aligning to the outside.
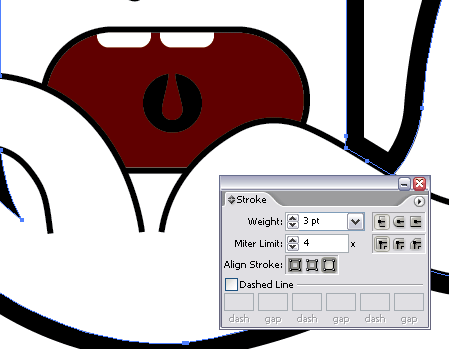
Fill the shape with a monsterish green.

Copy and Paste the body shape back in place, then align the stroke to the inside and change to a slightly darker, more blueish green.
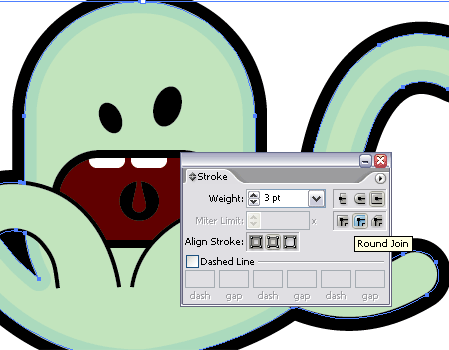
We ideally want the same effect on the two front tentacles, but because these are not complete paths we cannot align the stroke to the inside. Here's how to overcome this.
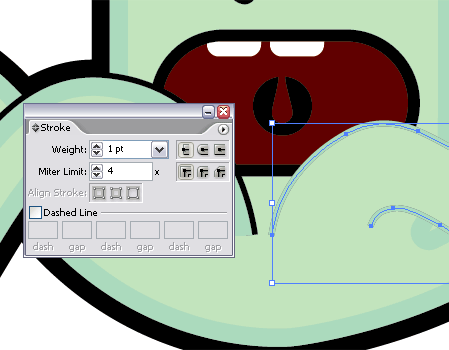
Copy and paste a tentacle back in place. Select one of the open points with the Pen Tool and close the shape by selecting the opposite open point. You will notice the cursor icon change to indicate the status of the point.
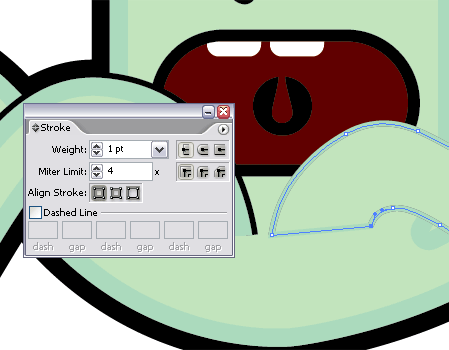
Great, now we can go ahead and add the thick inside stroke, but we are left with the line across the body where the path was just closed.
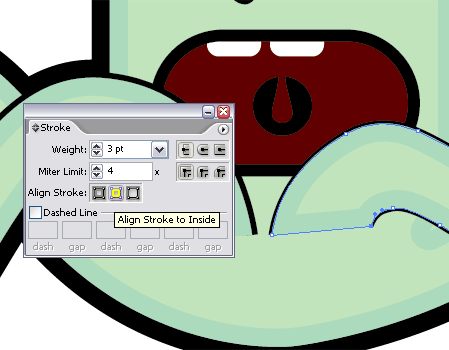
Select this shape and go to Object > Expand Appearance. This will convert the stroke to a complete shape.
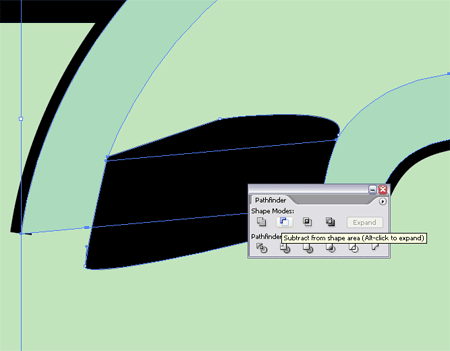
Create a makeshift shape following the contours of the two outlines with the Pen Tool. Use this shape with the Pathfinder Tool to Subtract From Shape Area. You may want to zoom right in and tidy up the points with the Pen Tool and Direct Selection Tool.

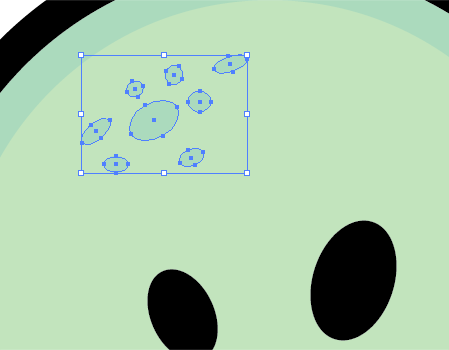
Add some finishing touches such as some spots/warts with the Circle Tool. Vary these in size and rotate slightly.
Bring The Slime! The slimey monster wouldn't be complete without some gooey drips, draw a circle, then drag the upper most point upwards with the Direct Selection Tool to create a teardrop shape.
Position these in varying sizes off the ends of the tentacles.
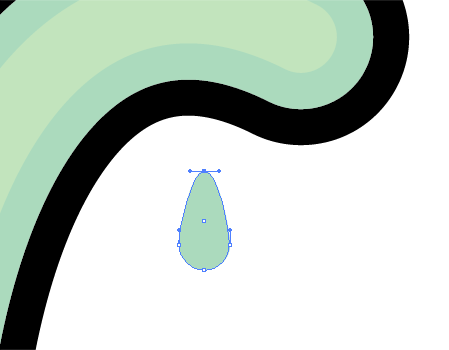
Add a pool of slime by using the Pen Tool, keep the angles loose to give a smooth, flowing shape then send it to the back by pressing CTRL / CMD + [.


That's the Slimey Monster complete and the end of the Monster Character series! Hopefully this mini-series will have helped out some Illustrator beginners in getting to grips with some of the basic tools and techniques.
Feel free to post up some comments on what you would like to see tutorial wise in the future, I’d be happy to help out.


Very good tips! ;)
Nice! Keep ehm comming :)
great site, you have just been rediscovered and been added to my daily sites to be checked!
Nice one, again. I love your monster characters.
sry for the question, but can you plz tell me how to make the Rounded Rectangle as you did, i just don’t get it xD? :D
btw nice tut.
Sure Peer, When you are clicking and dragging to create the rounded rectangle… before releasing the mouse use the ‘up’ and ‘down’ cursor keys on your keyboard to change the radius of the corners.
For the Slimey Monster’s body keep pressing the ‘up’ key so that the radius’ are almost at the max to give completely circular edges.
Nice, thanks a lot. Was new for me :D
Nice one Chris, top class tut as usual!
—
Marcus
how does one alter the corner radius once u have drawn the rounded rectangle? is there a way to change or do we redo the rectangle?
Grab the Direct Selection Tool (White Arrow) and drag a selection across four points at a time, ie the top four then drag them into the position you desire. Hold shift to constrain the axis.
hi, just wanna ask why is it that whenever i expand the stroke and de-checked the fill, the object will become square edges instead of round edges?
Hi Riki
I can’t help you on that one I’m afraid, I’ve tried a few different methods to find the problem but I still get rounded corners each time!
Strange!
thank. its so cute.
Great tutorial and site – thank you!
Nice, well done. Ever see Fairly Odd Parents? Kind of reminds me of the Aliens from… Europe.
AMAZING! This is some handy sh#t! :-)
I was wondering how you get rid of the ‘white box’ type objects that occur around using the pen tool for the tentacles. It seems of occur when there’s a bend (not a kink) and cover up anything underneath.
Thanks :D
I have the same problem as Riki there.
I think the problem is that the actual line isn’t selected too, just the box-like area (make any sense at all)?
It’s something like that. As an Illustrator beginner I found that particularly frustrating, but overall I thought the tutorial was well written and quite whimsical. Keep making more!
Thanks for your time.
hello
I have an illustrator 10 and I don’t have the “align stroke” on the stroke panel, so I can’t create the inner shadow effects… and I just can’t find it anywhere (also checked the help menu)
any idea?
Hey Ana
Another method would be to go to > Object > Path > Offset Path and enter a minus figure such as -3mm.
Then select your original shape and change the colour.
Chris
works that way!
thanx a lot
Riki, Had the same problem, go to path, then select outline stroke!
Had the same problem Riki
Go to path, then outline stroke!
How do you “Use the Direct Selection Tool (White Arrow) to delete the lower most points on the tentacles…”?
Im using the white arrow and it doesnt delete the points and make an open path as shown in picture #11.
Hi Jane,
It can sometimes be a bit tricky to select a point as they can be quite small, zoom right in to get a good view.
If you click on the path it should highlight and show all the points as hollow squares, when you click an individual point it should turn solid and disappear when you hit the delete key (or backspace).
Chris
That helped out alot. All this time I never thought about the delete key. Thanks Chris!
Glad I found the tip about making the tut compatable with AI 10. I’ll give that a go. Simply scaling my image didn’t work.
I can’t wait to develop my own little aliens. These will come in very handy in the future I am sure! Thanks!
Very nice!! There is a looot of detales guys… So Thx!
Thanks a lot for this tutorial, I’ve learned a lot with it.
And it was also fun creating an expressive character in a few steps!!
These are great tutorials, I went trough all four and actually spent a lot of great time with the the four monsters, thanks for that!
By the way, this is my first solo attempt of a monster, after seeing yours.
Quite nice!
Awsome!!!!!!!!
hey!
thank you for great 4 tutorials! they were my first few steps in illustrator.
s
I’ve tried this a couple times, and each time when I get to the step to align stroke, the option is grayed out. I have CS2. If i draw 2 objects not related, it allows me to Align Stroke. Once I Add to Shape Area, I’m no longer able to Align Stroke. What am I doing wrong?
Hi, I would like to know if I could link this tutorial to an online tutorial video I am making in my educational technology class on how to take stuff from Illustrator and bring it into Fireworks to make it into an animated gif. I used a lot of the methods you have on here in Illustrator and it would be rad if I could make it an extension of your methods. Please contact me. :)
Really cool design! When I see the step by steps it really shows how easy it is to do. All you then need is for your brain to breath and help you create the character idea.Thanks again
Great tutorials!
It would be great to post on how to work with the pen tool because it is still hard with all the different lines and pffft :)
(even .ai file organisation tips – as in layers – could be useful)
I had the same problem Riki. Thanks for posting hte solution Parker!!
It was kicking my butt.
Hi there, awesome drawing. But I saw a dude ripping it.
Look for a dude named balzsukr at this link.
http://forum.ragezone.com/f191/1v1-vi3tb0i2ty-vs-bloodshed-489411/index3.html
Hi, I´m stuck at this point:
Select this shape and go to Object > Expand Appearance. This will convert the stroke to a complete shape.
Create a makeshift shape following the contours of the two outlines with the Pen Tool. Use this shape with the Pathfinder Tool to Subtract From Shape Area. You may want to zoom right in and tidy up the points with the Pen Tool and Direct Selection Tool.
I have CS4 so I can make all, but when I use the Pathfinder tool it makes all the shadow white…