This post was originally published in 2010
The tips and techniques explained may be outdated.
Follow this step by step post processing guide to give your photos a dark lomo style effect with high contrast, blue tones and vignette burns. The effect is based on the popular lomographic technique and is similar to the processing effect used in many fashion shots and advertisement designs. Overall this effect does a great job of adding impact to a plain photography with cool colour casts and unusual saturation.
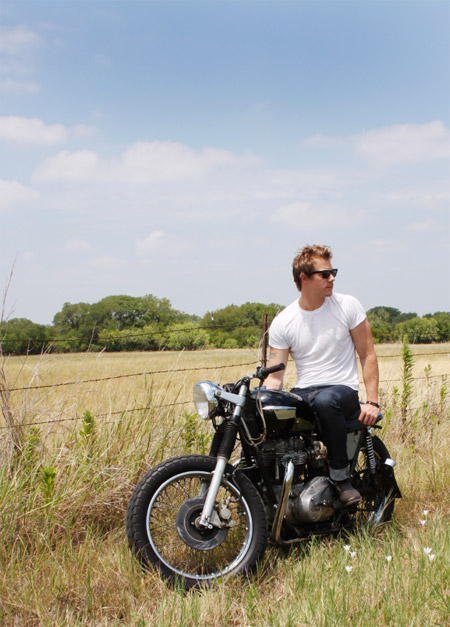
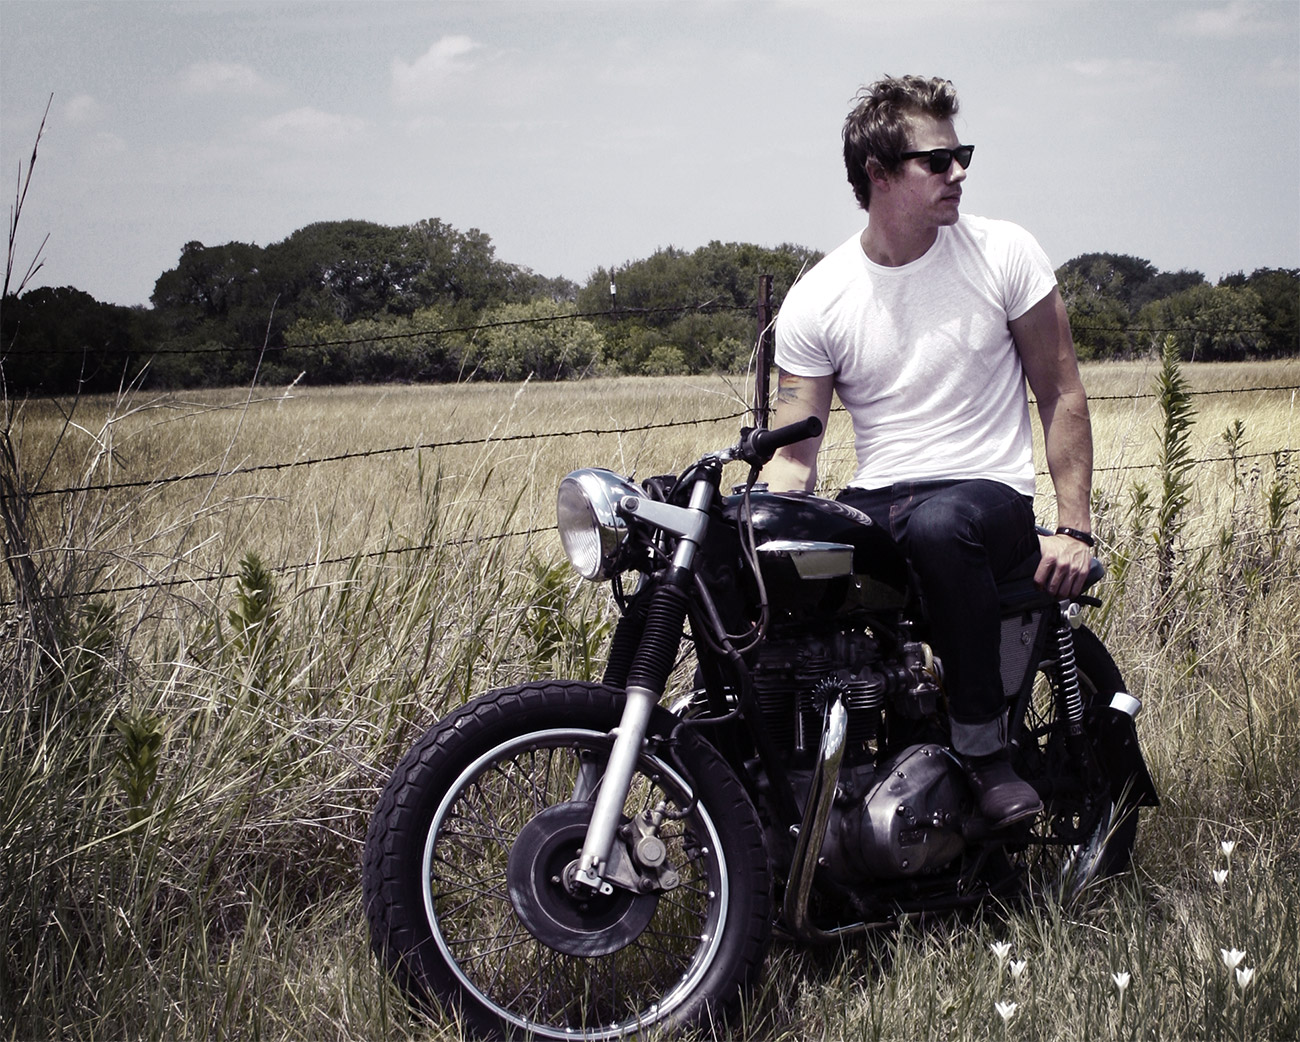
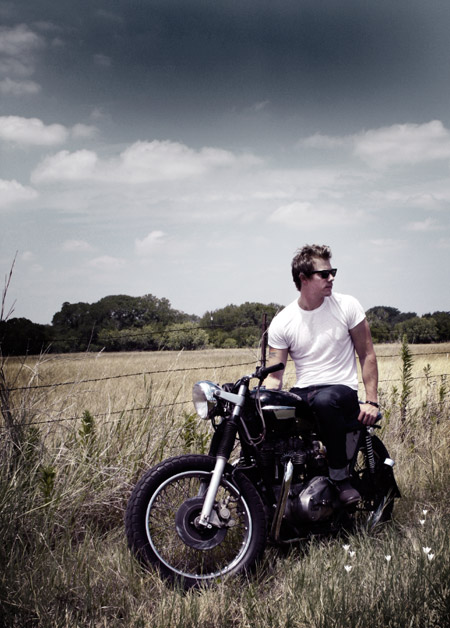
Begin by opening your photograph of choice into Adobe Photoshop. This particular shot is courtesy of ThinkStock and features a guy on a motorcycle with a blue skies and grassy fields.
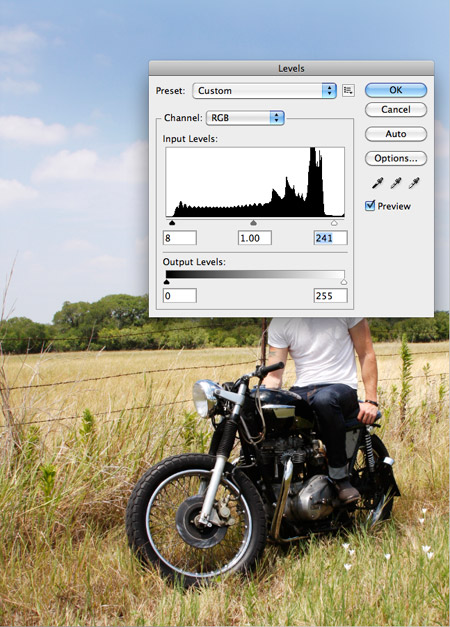
Go to Image > Adjustments > Levels and tweak the tones of the image. Match the shadows to match the histogram graph and clip the highlights to brighten up the whites.

At the bottom of the Layers palette, click the Adjustment Layer icon and select Curves. Change the drop down menu to select the Red channel and adjust the curvature of the graph.
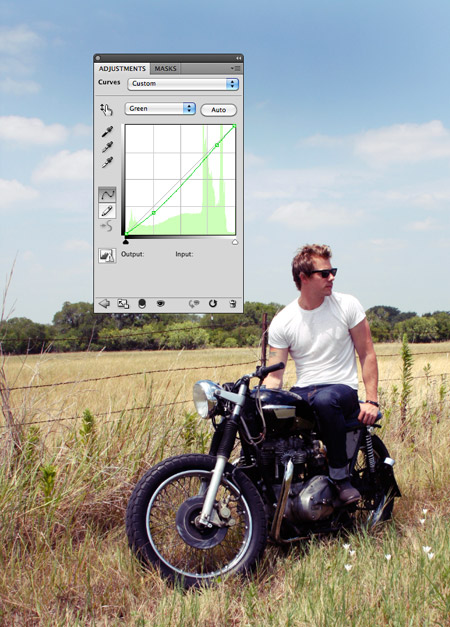
Change the drop down menu to Green and tweak the graph for the green channel to further alter the tones of the image.
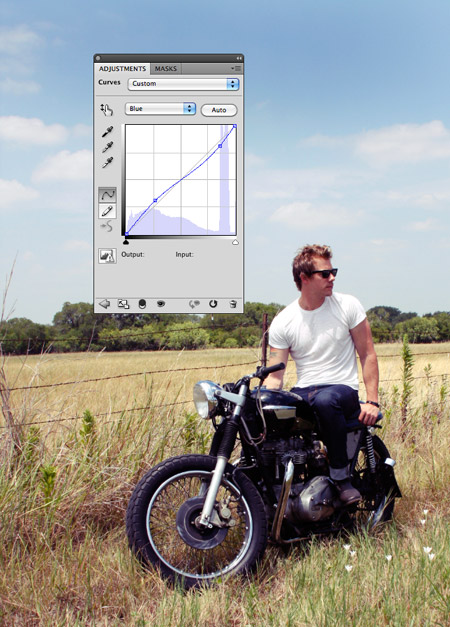
Finally alter the Blue channel, creating an inverted ‘S’ shape to enhance the blues to give a cool colour cast.
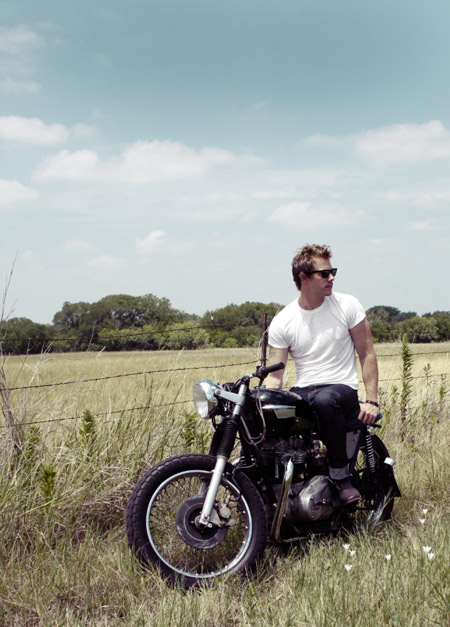
Go to Edit > Select All, then Edit > Copy Merged. Paste this new layer at the top of the layers stack, go to Image > Adjustments > Black and White then change the blending mode to Darken to mute the tones of the effect. Adjust the opacity of this layer to around 70% to bring back some of the colours.

Paste another duplicate of the image on a new layer. Select a dark and light purple for the foreground and background colours of the colour picker, then go to Image > Adjustments > Gradient Map. Change this layer’s blending mode to Hard Light at 50% to add a purple colour cast across the photograph.
Fill a new layer with black and change the blending mode to Overlay. Add a Layer Mask to the layer and use a large soft brush to erase out the Overlay effect from the main focal point of the photograph, which is the man and motorcycle. This then leaves darker tones around the edges of the document as a pseudo vignette.
Paint more black areas across the image with a large soft brush on a new layer, specifically across the sky and lower corners. Change this layer to Colour and reduce the opacity to around 75% to subtley desaturate the colours from these areas.
Duplicate the whole image once again using the Select All / Copy Merged commands, then make any final adjustments to the tone of the photograph using the Dodge and Burn tools at a low opacity. Areas of the face have been Dodged to brighten them up in order to emphasise the focal point, whereas the shading of the t-shirt, arms and chroming on the motorcycle have been burned to increase the contrast.
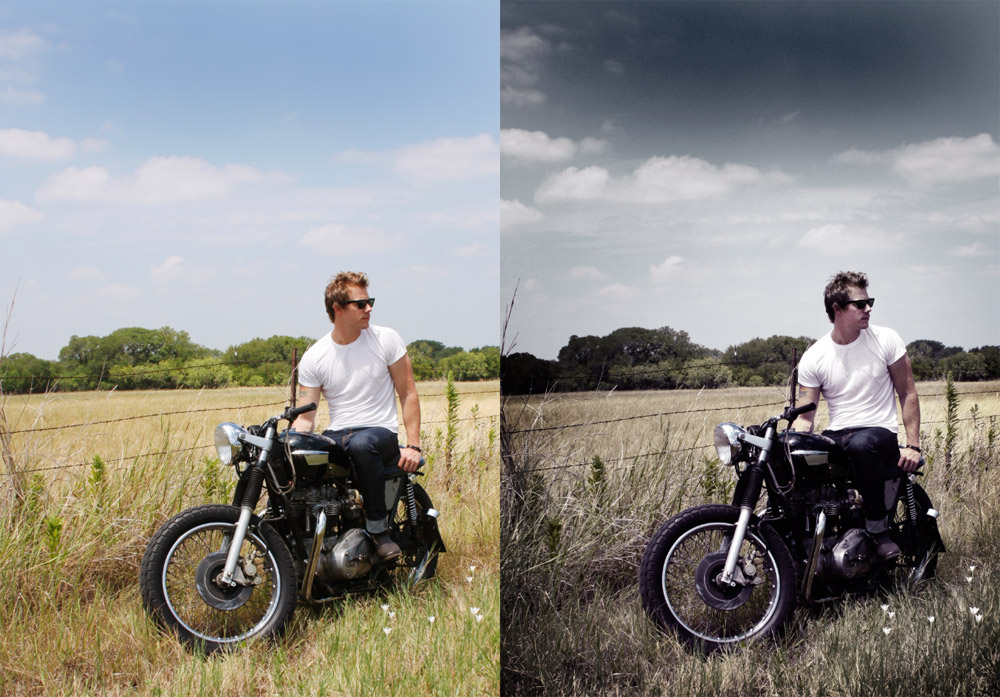
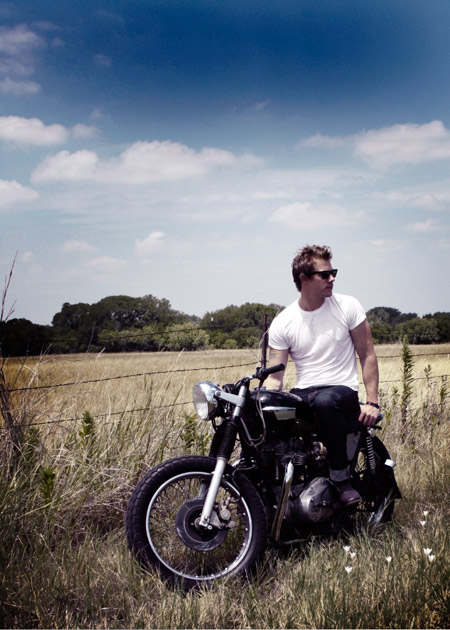
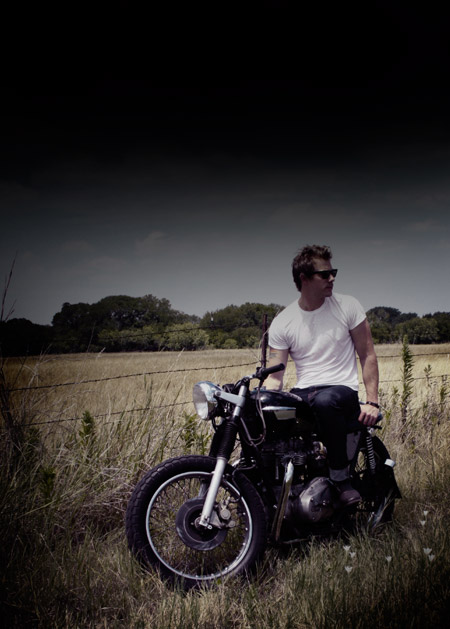
The final photo effect has that cool processed appearance with the off-colour casts, unusual saturation and vignette burns of traditional Lomo photography. Compared to the original the new photo effect is much more intense with a dark atmosphere – Perfect for any kind of magazine fashion spreads, advertisement designs or rock band group shots.

Thanks for the tut! I’ve got this slight obsession over lomo effects, and I just can’t find enough examples OR tutorials…
This is a brilliant tutorial that can be adapted accordingly to suit lots of different needs. It’s great how much the picture is transformed by these simple steps. I can’t wait to start experimenting with this technique.
WOW! I can’t wait to give this a go. Thanks Chris =D
Alternatively, you could just use Photoscape, and run the cross-process filter on the photo, which does pretty much exactly the same thing :)
There’s always one Chris! Thanks for the great tut matey!
Nice yar
short but useful training. thanks
woow, great tut. thnx :)
this is what i looking for! thanks! :)
Very nice tut. But this color is not new right :D
Nicely done, Chris. Thanks a lot for the useful infos ;)
Nice tutorial. I have to practice a bit on this
Thanks for the awesome tutorial Chris! Will try this on my next avatar! :D
Thanks for taking the time to submit your comments everyone – Glad to hear the effect is proving popular!
The look and feel of the image really are trend yea. Good tut, yet I failed horribly on my version.
Thanks,very nice effect.Gonna use it for shure.
Nice effect.
Thanks for sharing this.
Like it! Thank you!
Hey liked it,loved it and mentioned ya about 100 times in me blog!keep the great tutorials coming!
Love the tutorials, been thinking about ways to create this effect for a while now — thanks for posting. I’ll be off to give about three years worth of photos that ‘lomo’ look now!
Thanks for the tips! Processing photos in an interesting, less than straightforward way is something I struggle with, so I’m always interested to see what other people are doing.
Not fond of this “technique”. As a working photographer, this “lomography” bologna drives me nuts. People should be encouraged to take interesting photos, not make terrible photos even more terrible by treating them with crazy color effects. I have the same distaste for HDR as well.
Mis dos pesos.
Why didn’t you use your own picture on a bike? Would be awesome to see yourself pose like that. :)
Thanks for the tips! Processing photos in an interesting, less than straightforward way is something I struggle with, so I’m always interested to see what other people are doing
Hi Chris What’s Up dude
nice and you can used this effect to make a poster Movie :)
what do you think :D ?
Thats a really great photo effect, though I don’t think it will work on all images it certainly looks great in this case.
This is how my efforts turned out:
http://teqnoqolor.com/wp-content/uploads/2010/10/Before-After.jpg
this is awesome and very useful tip for me as i have to deal with atleast 50 photos a day…thanks a lot
Love this… I tried it and I am very pleased with the results… Thanks again for a great tutorial…
Dude… you constantly amaze. Has to be one of my fav websites. Please, PLEASE keep the awesome tuts coming. Thanx!
I love your blog! Thanx for all the awesome tutorials :)
The effect created on this photo really adds character to the image and creates a lot more depth. The impact created would be a great asset to display on a website and really attract the users attention. This in turn would reflect on the business as been just as professional and successful as the photo.
The steps given to create this effect are simple and easy to follow, making it easy for anyone to follow and get the desired effect they want.
Love that effect! I use it a lot for my photos, except I use Picnik to create the effect – it’s really simple and easy to do. ;)
Great tutorial, I have been trying looking for lomo effect like this for a while. Thanks for creating the tutorial.
Thanks,very nice tutorials
Thanks, I learned something new!
Great simple tutorial, cheers
thats a great effect for photos and looks easy too.
Very nice Chris! Very handy!
Great tutorial as always, thanks!
Hi Chirs,
I love the logo that you have created for vivid ways, awsome!
Could please design a logo for my start-up company( with a very little budget) ‘www.megavision.in’ specialising in large/mega scale video screens/displays.
Awaiting reply,
Thanks and have a niceday
-B.Mistry
This is great. A big fan of this effect!
wow great effects thanks for sharing this nice tutorial it is more useful to me. keep posting more effects
I am still learning and so can you please tell me exactly how do you “Select a dark and light purple for the foreground and background colours of the colour picker”? thanks