This post was originally published in 2009
The tips and techniques explained may be outdated.
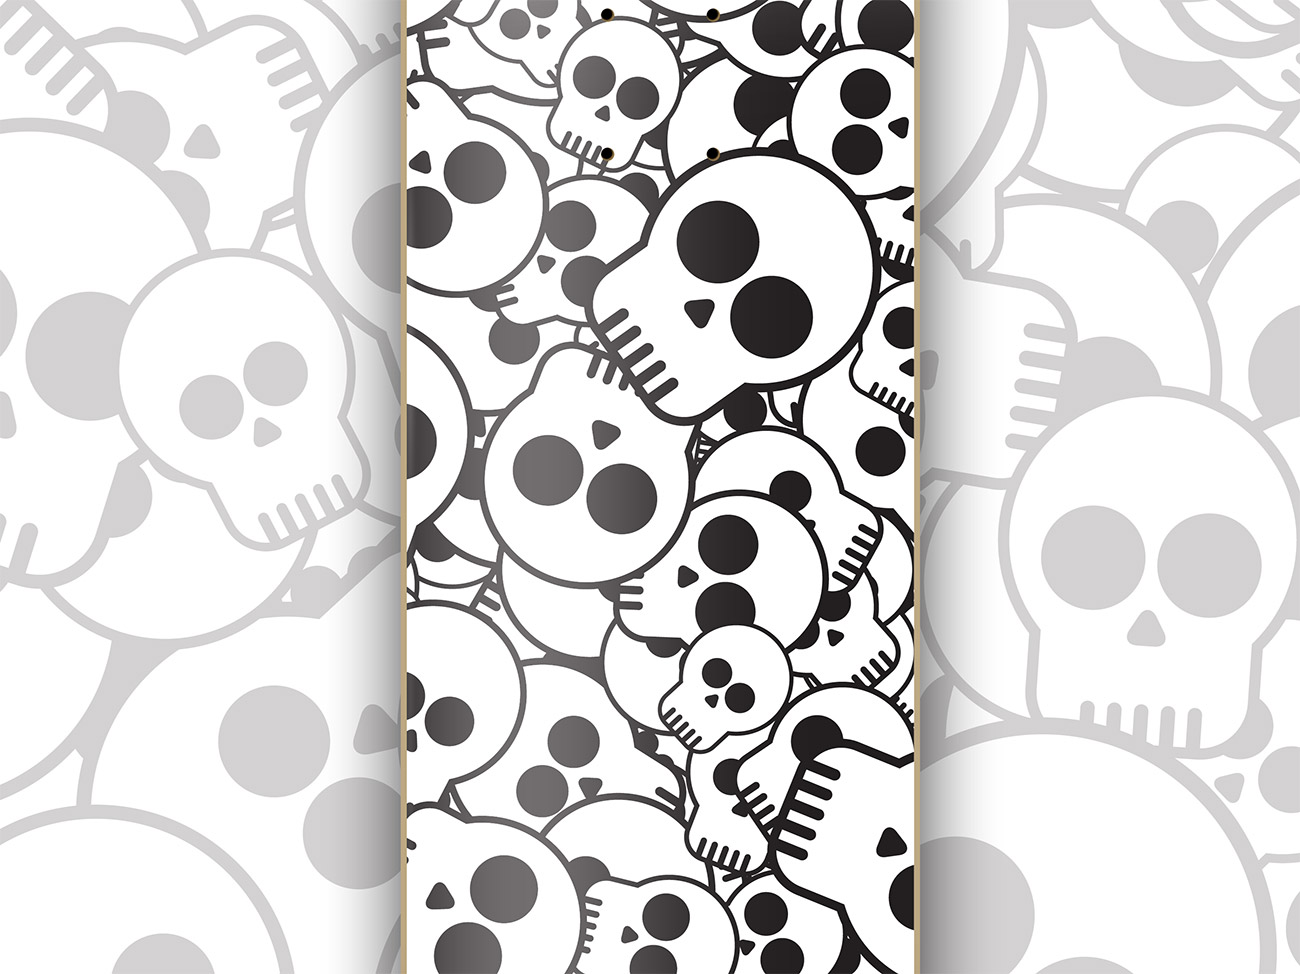
Illustrator’s built in Symbol Sprayer can be a highly useful tool for quickly creating awesome pattern graphics. Let’s look at creating a few vector skull graphics, then combine them into an intricate pattern design to customise a skateboard deck.
We’ll be using our design to create a custom skate deck graphic, but it doesn’t have to stop there. This technique can come in handy for any design project.
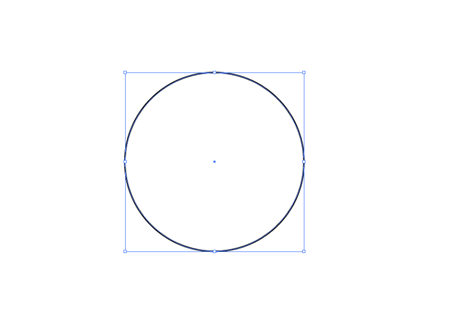
Open up Adobe Illustrator and draw a circle onto the artboard. Hold Shift to constrain the proportions.
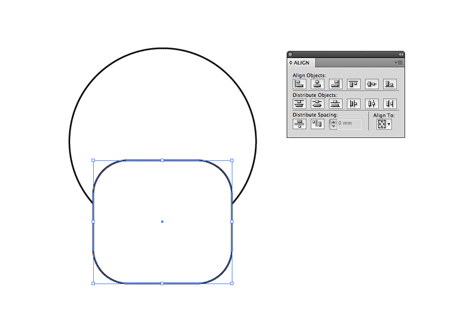
Draw a Rounded Rectangle onto the artboard, alter the radius of the corners by pressing the cursor keys. Overlap the rectangle with the circle and Align along the vertical axis using the Align Palette.
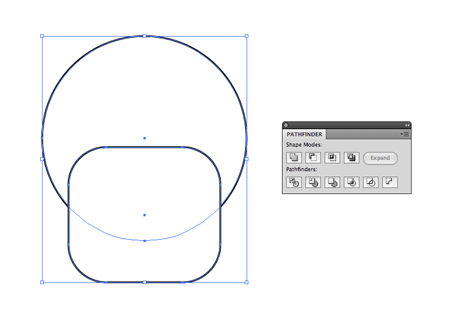
Combine the two shapes using the Add to Shape Area option from the Pathfinder palette.
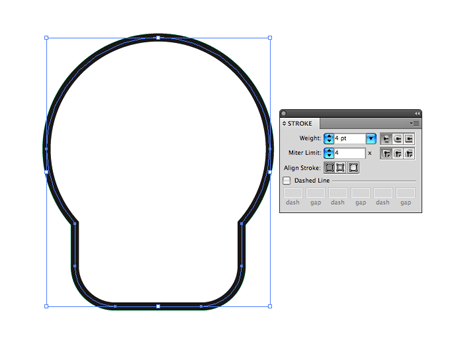
Adjust the stroke of the new shape to add a thick black outline.
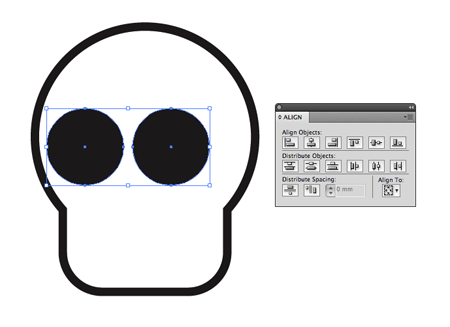
Draw a circle filled with black, then duplicate it to the side. Group the two circles then align them centrally with the overall skull outline.

Grab the Star tool and click and drag a shape onto the artboard. Before releasing the mouse, press the downward cursor key to limit the points to three, creating a triangle.
Go to Effect > Stylize > Round Corners, enter a figure of around 10mm to round off the pointed edges.
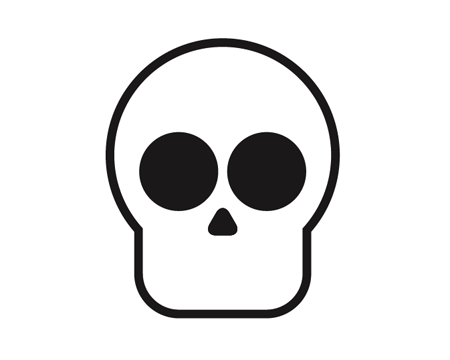
Scale and position the triangle as a nose on the skull.
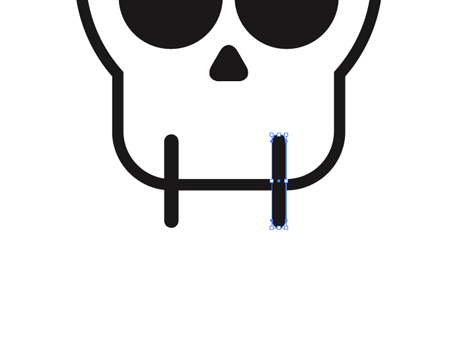
Use the Rounded Rectangle to create a long thin shape. Copy (CMD+C) and paste in place (CMD+F), then move to one side while holding Shift.
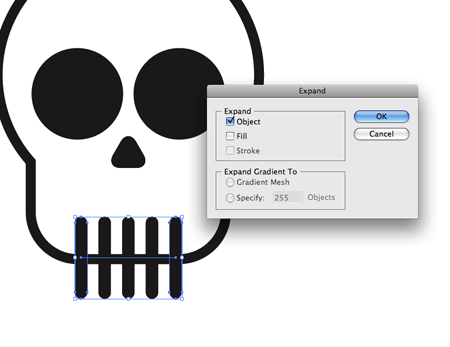
With the two shapes selected, go to Object > Blend > Make. Go back and adjust the Blend Options under the Object menu to give three specified steps. Go to Object > Expand and select just the Object checkbox.
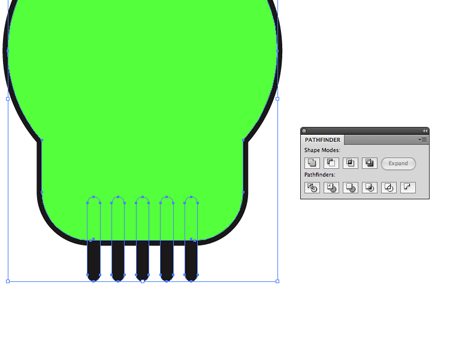
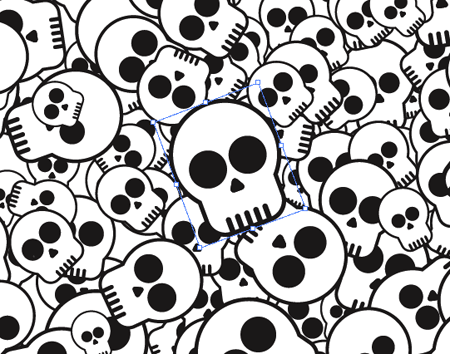
Duplicate the skull outline and send it to the top of the stack (CMD+Shift+]). Temporarily fill it with a random colour. Ungroup the collection of rectangles, then go to Object > Compound Path > Make. Select both the new skull outline and set of rectangles and use the third option from the Pathfinder palette to trim out the excess.
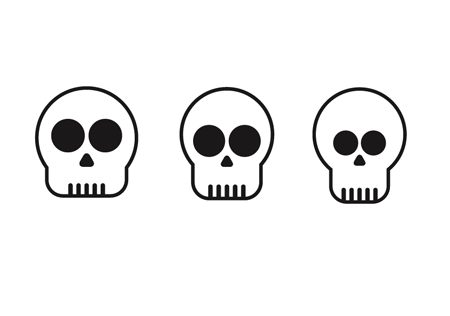
Repeat the last few stages to create a set of three skull graphics, each with slightly different proportions to add a little variety to the pattern.
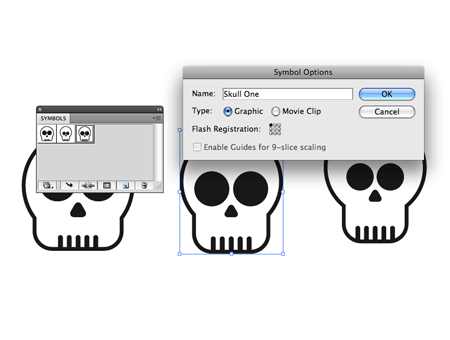
Select each graphic individually and click the New Symbol icon from the Symbols palette.
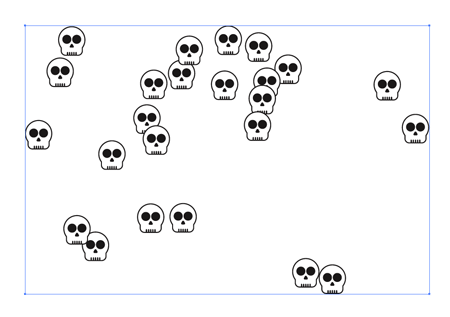
Grab the Symbol Sprayer tool and select the first skull graphic from the Symbols palette. Click and drag across the artboard to place the first few instances of the graphic.
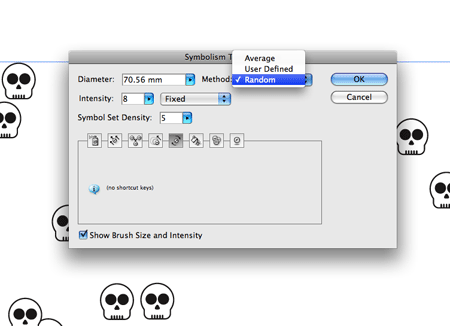
Click and hold the Symbol Sprayer icon to reveal the secondary tools. Double click the Symbol Rotator to adjust the settings. Change the Method to Random.
Use the Symbol Sprayer Rotator to spin the skulls in various directions, creating a purely random layout.

Select the Symbol Sizer tool and change the Method to Random. Then use the tool to add a variety of sizes to the symbols.
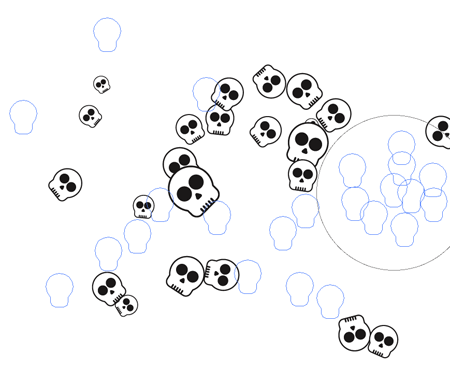
Select the next skull symbol in the palette and go back to the basic sprayer to add more graphics to the design.
Repeat the process of rotating and scaling each set of symbols, then move onto the next skull.
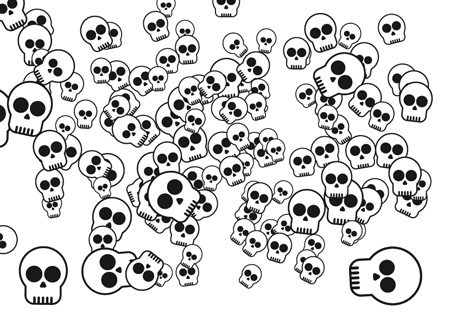
In no time the artboard will be packed full of random skulls. Keep alternating between the symbols until all gaps are filled.
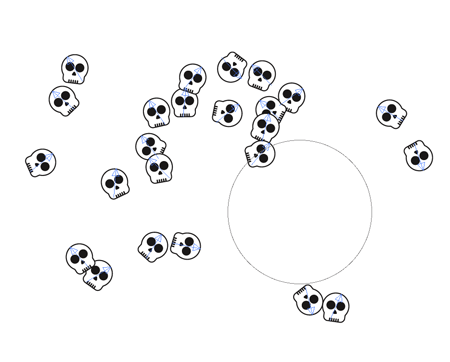
Manually drag a symbol onto the design to fill specific areas.

Zoom out and check over the design for balance, ensuring no areas have a bunch of larger skulls or a collection of graphics facing the same direction.
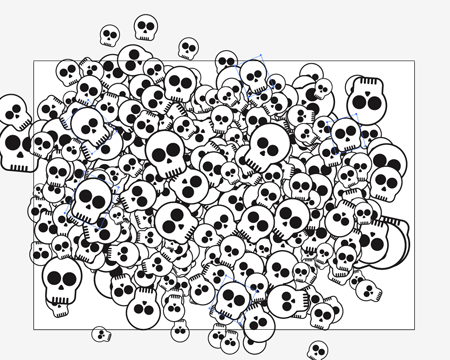
Position individual skulls onto the design to balance out the pattern with large graphics evenly spaced.
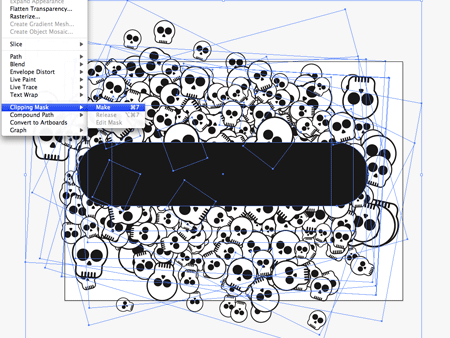
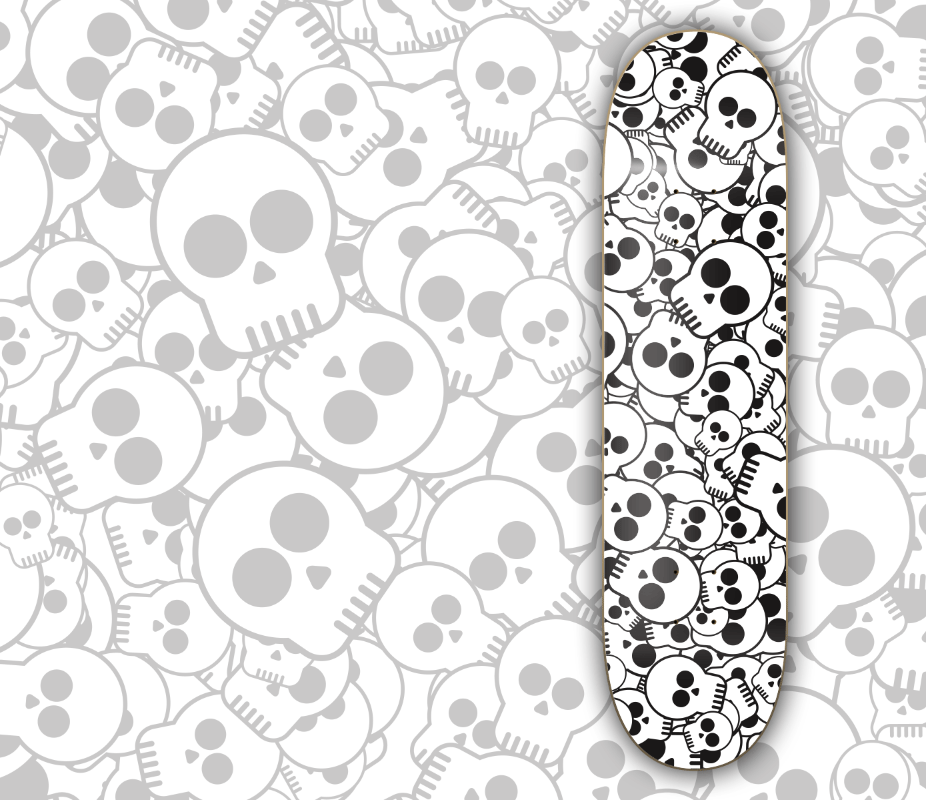
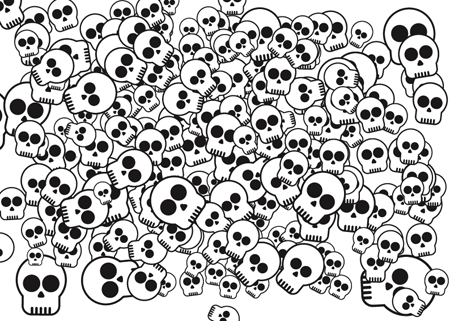
Select all and group the skull symbols. Use the Rounded Rectangle tool to draw a shape simulating a skate deck to ensure a large enough area is covered.
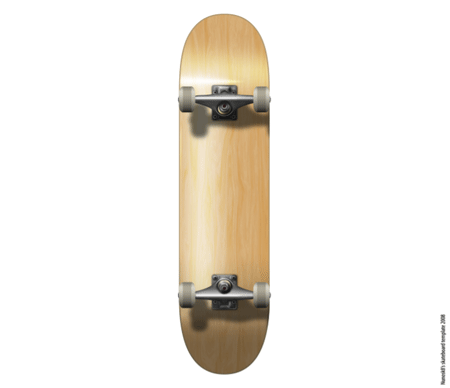
Download this handy skateboard deck template from Deviant Art [Nunosk8], and open it up in Photoshop.
Paste in your design to create a realistic mockup of your skate deck graphic.
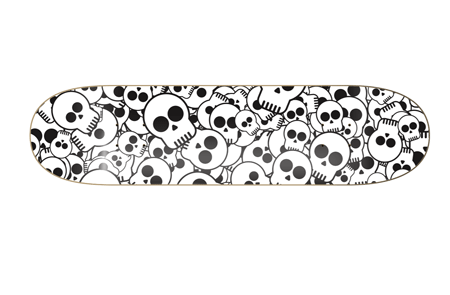
The final design uses just the three skull illustrations, but thanks to the Symbol Sprayer, a cool pattern can be quickly created. The result is an awesome deck design!
Excellent tutorial, really simple but taught me some stuff I didn’t know ;) Thanks!
No bad: the skulls are very prety!
cool ;)
Very nice Chris.
Nice tutorial! Only one thing missing => a link to someone who can actually print the design on a board ;)
http://www.inkableplanet.com can print these images on a skateboard
very cute skull u have there Chris :)
I love that you design decks Chris but suck just as bad as me at skateboarding. Nice little tutorial :)
Simple and original :)
Really nice skull design, simple and nice, as the tutorial, great article Chris
Simple and Effective…! really interesting one
great as usual chris! :)
Cool! Thanks for sharing your stuff!
Great and simple tutorial! Cute skulls too.
Really nice! Abstract design and very nice piece of creativity :) Good job.
Cool tutorial, nice design.
Wow, sick design Chris! Do/did you ever skate? ;p
You seem pretty into your skateboards :D
Nope, apart from those cool 80’s wavy shaped skateboards I haven’t ever skated. Just have some strange interest in designing deck graphics for tutorials.
I might build a ramp in the garden and learn though… :-)
Verry verry nice :)
I love your deck designs, Chris.
really nice article and nice way to make skulls
awesome tutorial chris.
i used to skate when i was younger and am going to give this a try :)
thanks
Nice hahha!
Men, You are genius!
Skulltastic, thank you!
AMAZING tutorial [-_-] Congratulations Chris!!
make and order that skateboard at http://www.boardpusher.com, thats how I produce my skateboards.
Hey Chris I took your idea offline and put it on my moleskine and wallet.
http://www.flickr.com/photos/ayushsaran/3902191792/
I was looking for a way to personalize them, black leather just wasnt saying ‘me’.
Awesome technique
Good Stuff Chris!
Very cool, thanks Chris!
@Christopher Bathgate thanks for sharing that link, always wanted to produce my own skateboard.
Nice tutorial Chris!
I highly recommend building that ramp and skating, did it for 13 years when I was younger. It’s so much fun!
good tutorial you got here
This is such a simple idea that has a very effective outcome.
I’ll be sure to give this a go when I get a chance!
Thanks Chris
You make it look too easy.
I think it’s time to move from the gimp to the shop!
Jack
awesome tutorial here, liked it very much :)
Awesome tutorial!! picked up a nice few illustrator tips and tricks on the way!
simple ai tut I like : )
Awesome. Simple but awesome!
Great tutorial. Thanks for the tips.
Very Nice! =)
That’s awesome!
nice tutorial
very cute skull u have there Chris
Very cool skull, took me a while to make it tough, since it was only the second time using Illustrator. Instead of making a Skateboard I made a Snowboard cause I still had a template from a long time ago, which turned out rather cool too :D
Fantastic tutorial. Always loved your stuff, keep it up, you’re the man!
very nice post thanks for time that you spend with us:-)
Awesome, just got a new deck might have to try this out for a fun little project.
Great tutorial!! Every day i discovered new things with your tutorials. Your tuts help me a lot in my job. Thanks very very much.
great tutorial.well explained.
thank you
sema