This post was originally published in 2008
The tips and techniques explained may be outdated.
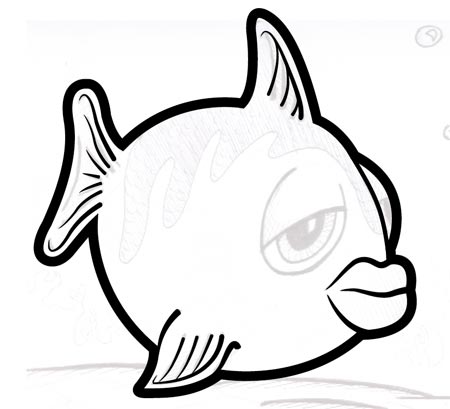
One of the most popular articles here on Blog.SpoonGraphics is how to create a vector cartoon character from a hand drawn sketch, an Adobe Illustrator tutorial covering the process of creating Captain Blackspoon.
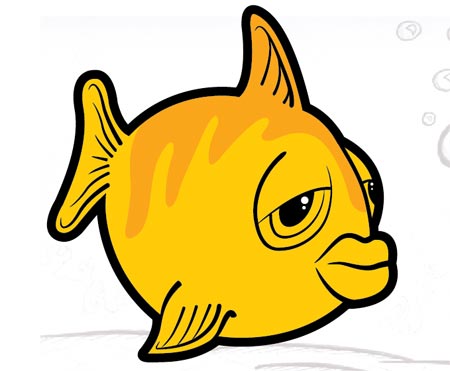
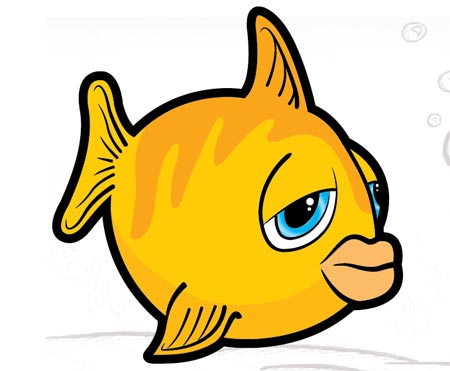
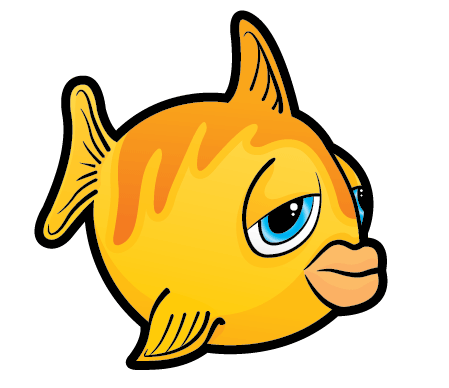
Using similar techniques, follow this tutorial to create your own vector character; Freddy the Fish.
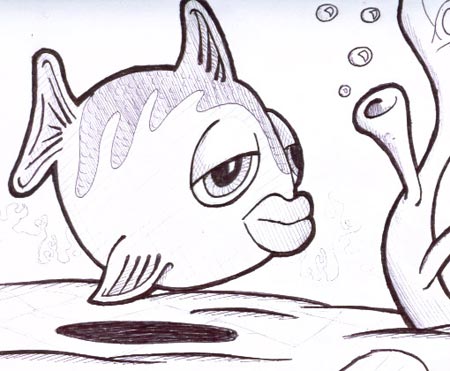
As with Captain Blackspoon, the process starts with a hand drawn doodle which is scanned into the computer.
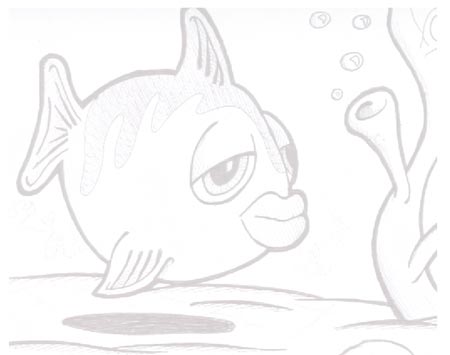
Open up Adobe Illustrator and place the scanned image into the artboard, set the opacity to 20% and lock the layer.

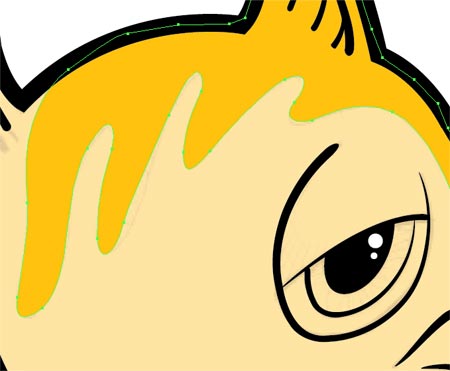
Create a new layer above the scan (name it outlines) and draw a path following the outside of the character using the pen tool.
Use the Direct Selection Tool to tweak the points of the path to your desire.
Add a thick 9pt stroke to the path.
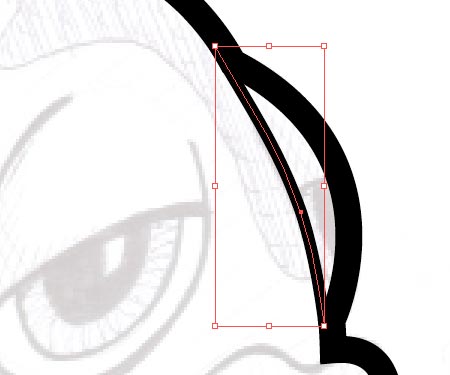
Follow on the flow of the line between the eye and body with a thinner 4pt stoke.

The traditional method of inking drawings results in a tapered brush stroke where the pressure of the pen minimizes to a point. To create a similar effect in Illustrator we need to create a new art brush.
Draw a circle somewhere on the artboard making the size as wide as the largest line width.
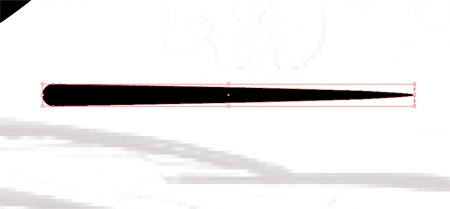
Use the Direct Select Tool to drag the right most point outwards whilst holding Shift.

In the Brushes palette click the 'New Brush' icon and select 'Art Brush' from the menu.
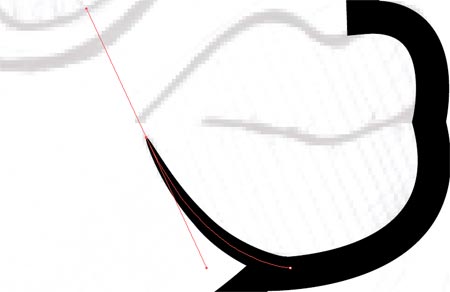

Continue drawing paths across the detail of the character, then select the brush from the Brushes Palette. Line up the stroke with the large outline to create a smooth flow.
Use varying widths to the different levels of detail, where the finer lines are stroked with a 0.5pt line.
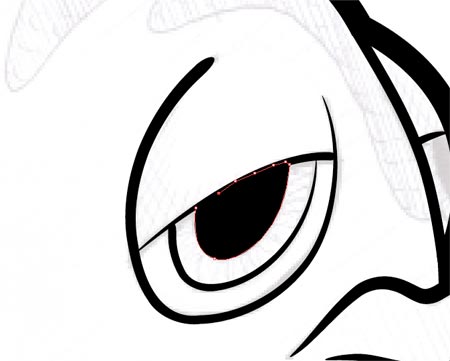
Repeat the process on the outline of the eyes, then create a shape with a black fill to act as the pupil.
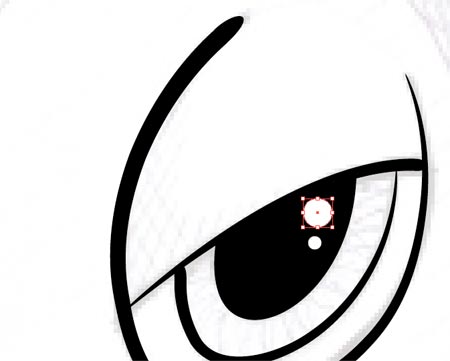
Add a couple of circles to the pupil as highlights.
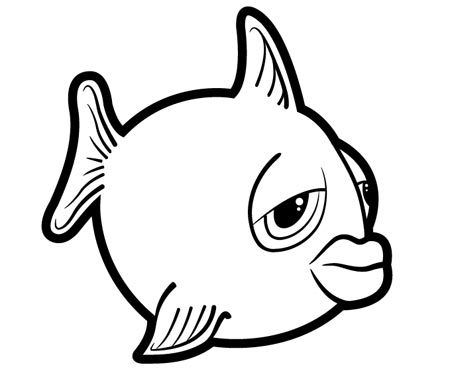
Toggle off the visibility of the sketch layer to check out the outlines so far, adjust any areas as necessary.
To begin adding colour create a new layer between the sketch and outlines. Select a colour swatch and roughly draw around the outline of the character, make sure not to stray beyond the thickness of the black stroke.
Drop the transparency of this new block of colour to see the outline of the scales pattern.
Bring back the transparency to 100% and fill this area with a slightly darker tint.
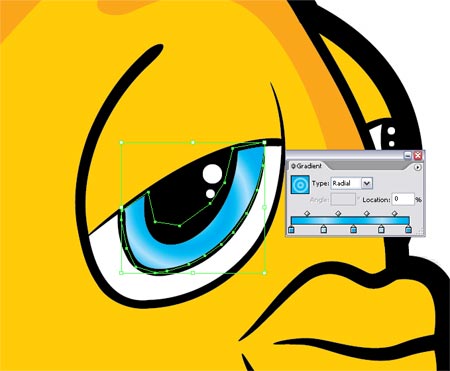
Begin work on the eyes by filling the relevant areas white using the same process of roughly drawing a block of colour around the necessary area.
Add a little more detail to the iris by filling the area with an intricate gradient rather than a solid colour.
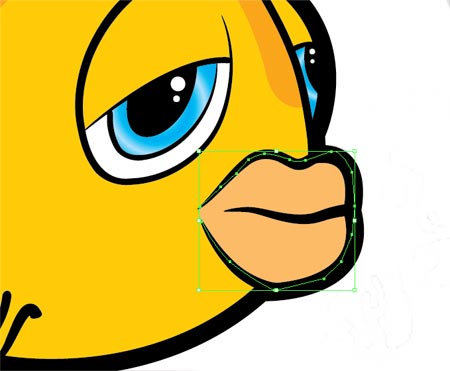
Pick a hue for the lips and draw in the block of colour.
Draw a large area of shade on across the underbody on the character using a slightly darker tint. Correct the area around the fin where the shadow overlaps by drawing an extra area of the base colour.
Add more areas of shade around the eyes and lips to give the impression of a three dimensional form where the light is cast across the shape.
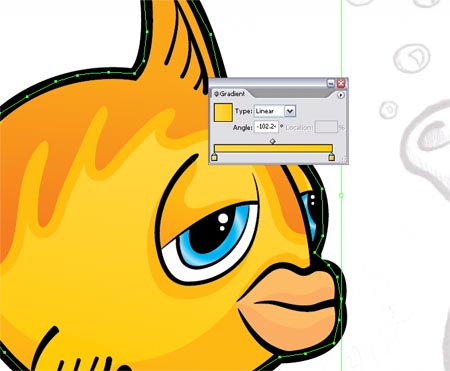
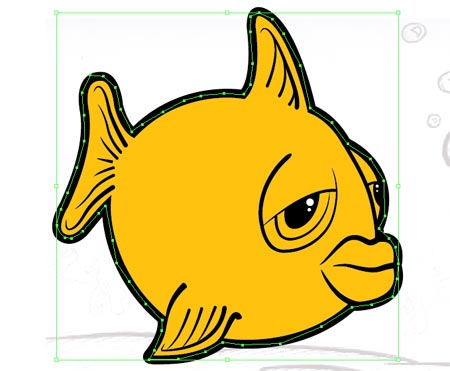
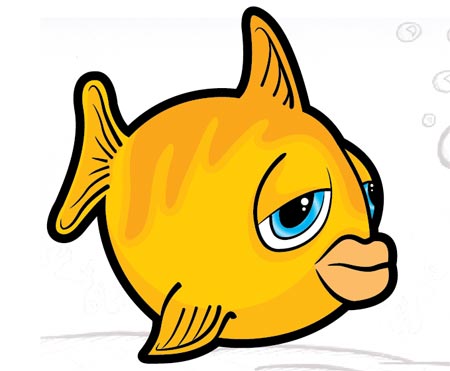
The design process could stop here, but to add a little more depth to the character use a few very subtle gradients across the blocks of colour. This will produce a gradual change of colour from light to dark giving a better impression of the shape.
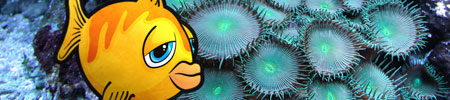
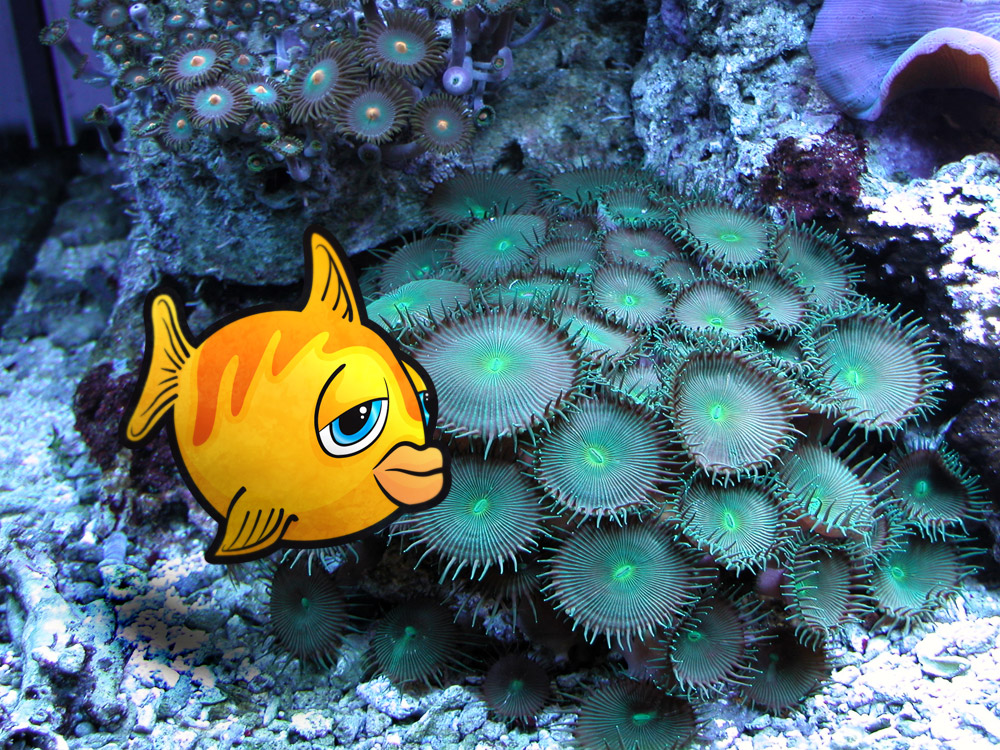
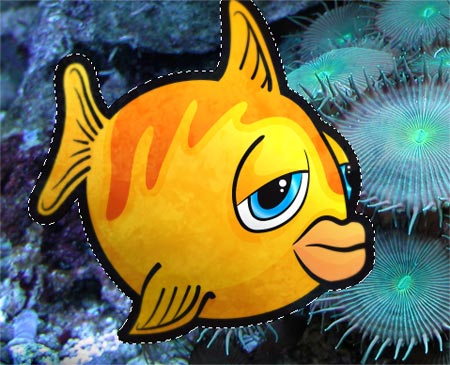
The character design is complete, but Freddy the Fish needs a home. Jump onto the internet and find an underwater scene, I found a corel scene from Stock Xchange.
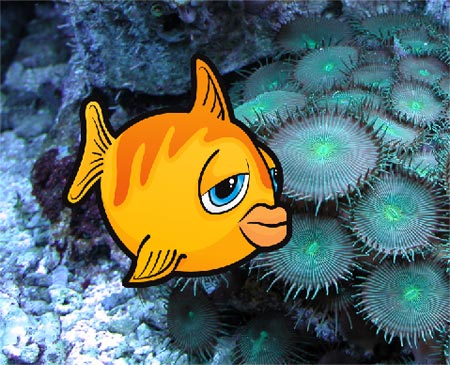
Switch over to Adobe Photoshop and open up the scene, paste in your character and scale to size.
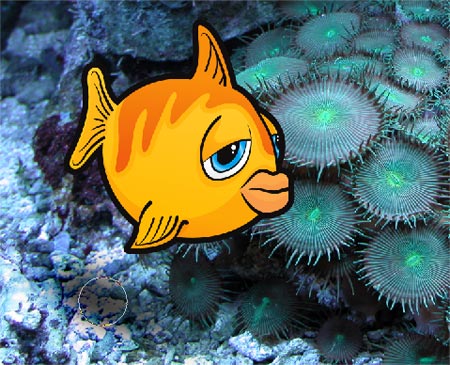
Use the Burn Tool to create a shadow on the background to help the character blend into the scene.
Also use the Burn Tool and Dodge Tool to add extra highlights and shadows to the character taking notice of the light sources in the image.
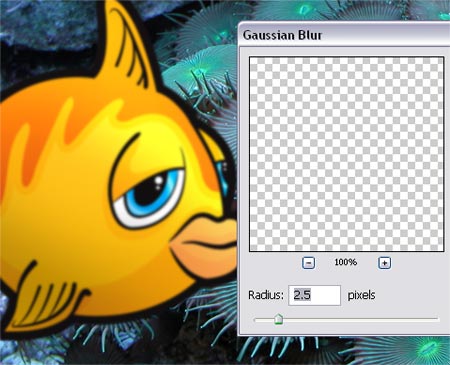
Duplicate the character layer and add a slight Gaussian Blur. Use a large, soft Eraser brush to delete out the main body of the fish, leaving just the fins with a slight blur.
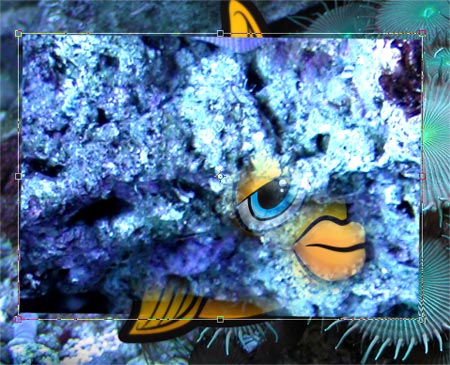
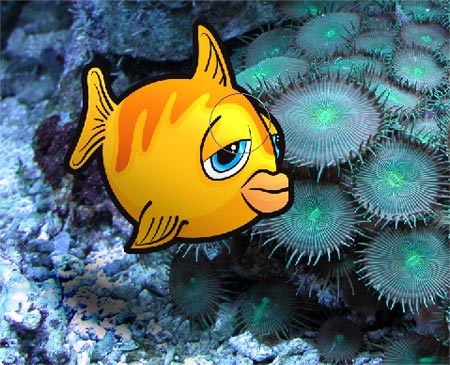
Copy and paste from a rocky area of the background, position this over the character.
Change the blending mode to Soft Light and drop the opacity right down to 20%.
Freddy the Fish is now complete with his new home.
Enjoy the tutorial? Please feel free to Digg or Stumble the page to share with others!
Very good job, thanks for this tuto :)
good but I dont think Ill use this tutorial..
I love his bored face expression :D
Great tutorial Chris! Some nice techniques there, thanks!
Marcus
Fantastic, i think more tutorials like this wud be great as i personally am big into the whole cartoon creation thing, but find it hard to do things in illustrator,
Excellent! Thank you so much for sharing! I now have a vector parrot pet!
So easy to follow! Love it!
nice and simple illustrator tutorial..
Good tutorial. I like how you showed using the sketch, creating varying line widths, and adding texture to the character. thanks.
very good… straight to the point
Thanks for the tutor. Very nice illustration
great …well done … thanx for sharing :)…i’m following all of your tutorials .
Thx for this tutorial. :)
I have two questions. First one, why don’t you use scaned image as template layer? It will automaticaly decrease opacity.
Have you tryed outline outside and inside stroke and then use subtract function instead of using different sizes of brushes? I hope I was clear:) I would like to know which method is faster or just simple?
Thx!:)
great tutorial!!!
Fantastico!!
Nosostros siempre encontramos estos tutoriales muy buenos!
We always find your tutorials very informative and creative! keep up the good work!
http://www.computido.com
Your tutorials are very inspiriational. Thanks!!!
cool
My name is Nuhu, i want to learn about desing using adobe photoshope and coral drawn and other design programs, i am graphic desinger.
So please how can u help me with some books and cds to install on my machine and start to learn?
Thank you, hear from you soon.
This is my email schily_otto@yahoo.com
From Nuhu
A very useful tutorial, nicely presented and easy to follow.
I like this tut! Cartoon effect is very interesting :)
Thanks Chris, this tutorial was just similar to that of Captain Blackspoon. But last few steps were interesting. Thanks again for sharing your skills.
good job DUDE!!!
good stuff man !! simple but effective … use my webaite if you want to contac me ….
verry good, but i wanna learn more illustrator.
thank you
Nice tutorial!
I do a lot of cartoon work in Illustrator, so it’s always interesting to see how other artist work.
but what if I dont want to make a fish…
=)
great tut
thanks
awesome :D
nice tutorial thanx
mahesh
petunjuk yang sangat mengesankan..?!
wah jan… apik tenan desain sing mbok gaweee… pancen nyoto yen wis menguasai teknik teknike… tak kei jempol lima
Hey thanks for the tutorial, I am a complete beginner and this has given me a lot to get started with.. maybe one day I will be able to some cool manga style characters.
HEY THNX THIS I WEL WKD PROPA MINT THNX AGEN
WTF, I can’t get the tapered brush stroke. When I draw a circle, press down shift with the direct selection tool and click on the right outermost dot, it doesn’t do anything but act like I’m using the pen tool or something. I’m using CS, what am I doing wrong??! :(
ok, i THINK i got it now :)
BRAVO!!!!!
Thank you so much for the fab tut! I normally work with PSCS2, but have been wanting to learn Illustrator. Up to this point about all I’ve done are some simple doodles and swirls. This tut was excellent, helping me learn a few new things – especially about making an art brush -awesome! Thanks so much! I’d love to hear about other good tuts for beginners if you have them. :) (and BTW, I really love my cute little fish!! My son will be jealous that I did it on the computer! LOL!)
Nice. I’ll probably still make A cartoon the easy way. But vector work has some pluses.