This post was originally published in 2010
The tips and techniques explained may be outdated.
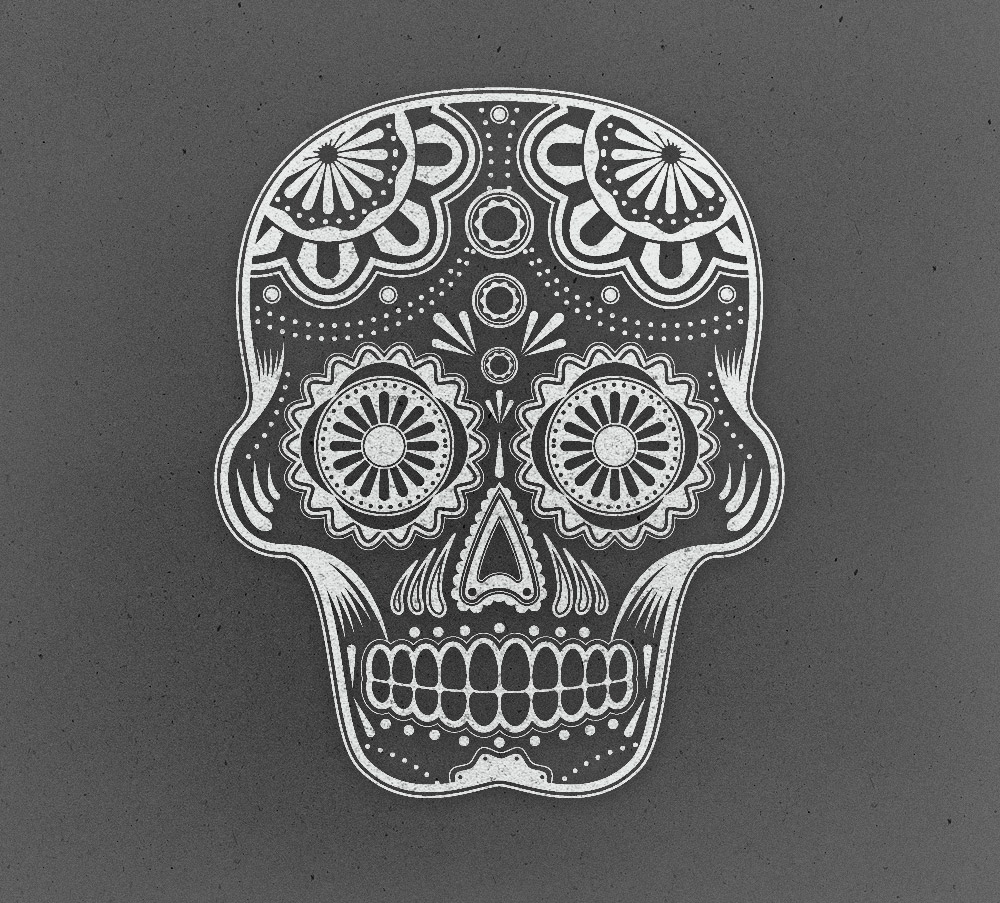
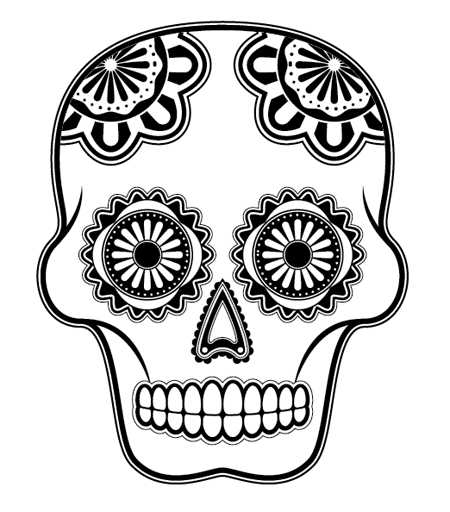
Follow this Illustrator design tutorial to create a super detailed sugar skull illustration made from lots of sweet vector elements. We’ll use a mix of basic and advanced Illustrator tools to build various decorative objects to slowly build up the features until we have an awesome looking skull design that pays homage to the Mexican Dia de los Muertos tradition.
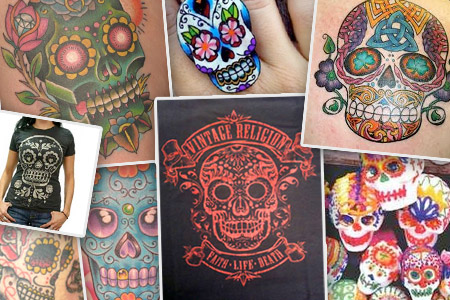
Sugar skull originated as part of the festivities of the Mexican Day of the Dead (Dia de los Muertos) holiday. The traditional sugar skull is a sweet treat that’s decorated with lots of bright and colourful designs, which makes it a popular source of inspiration for designers and illustrators. The sugar skull theme is also hugely popular as tattoo art, and makes an equally trendy apparel design. A quick search online brings up plenty of resources to feed your imagination and generate ideas for your own skull design.
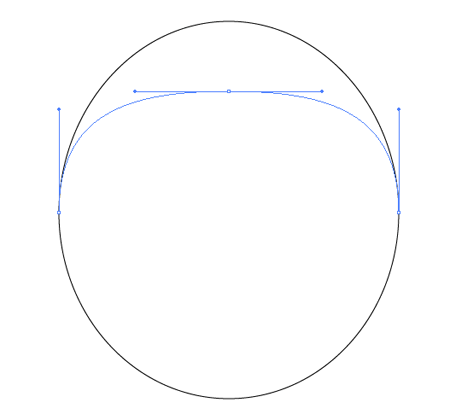
Let’s get started with out own vector sugar skull Illustration. Open up Adobe Illustrator and draw an oval onto the artboard. Use the Direct Selection tool to drag the upper most point downwards (hold Shift) to flatten out the top curve.
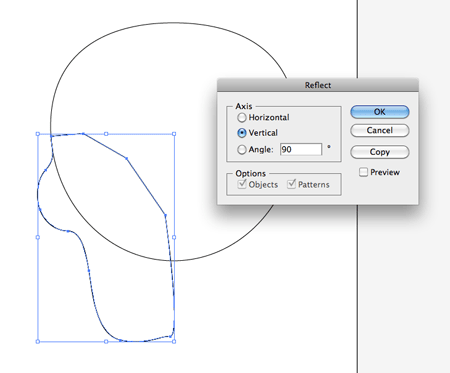
Use the Pen tool to complete the outline of a skull by drawing a protruding cheek and jaw line. Finish the lower jaw along the centre line of the skull. Copy (CMD+C), and Paste in Front (CMD+F), then go to Object > Transform > Reflect to flip the duplicate over.
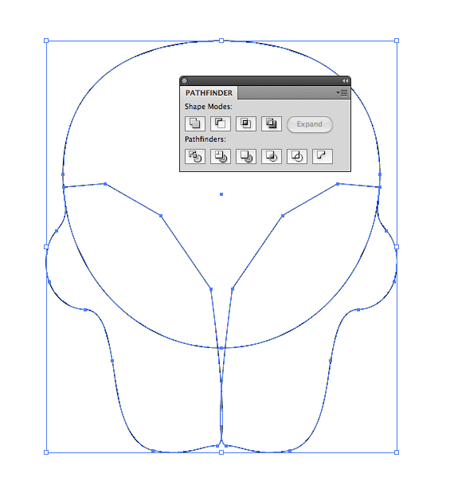
Align the duplicate to the opposite side of the skull, then merge all the objects together using the Pathfinder tool.
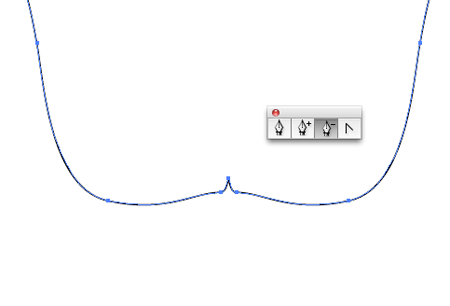
Zoom in and tweak the outline where the two halves are joined. Removing stray points with the Pen tool will clean up the outline and remove unwanted kinks.
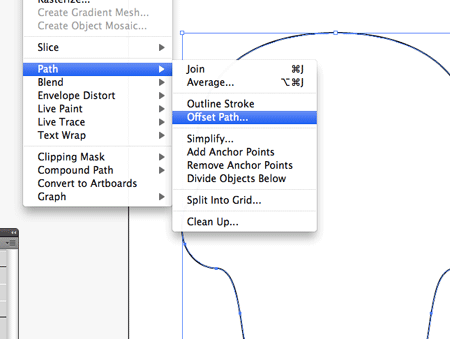
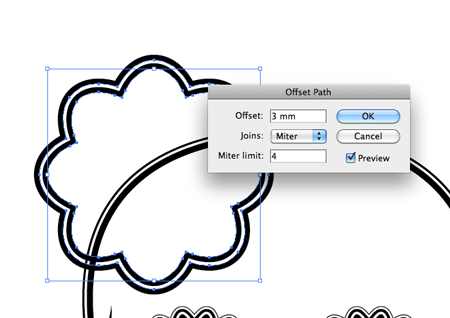
With the outline selected, go to Object > Path > Offset Path. Offset the path by 3mm, then right click and Ungroup the two lines.
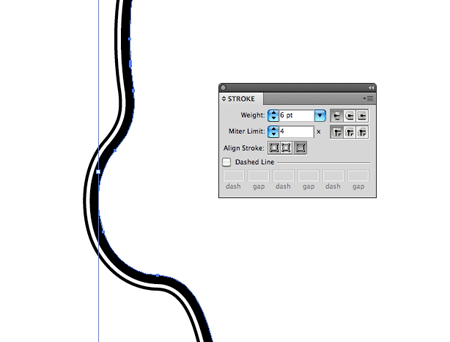
Add a thick 6pt stroke to the inner outline and a 2pt stroke to the outer outline. Align both strokes to the outside of the path using the Stroke palette.
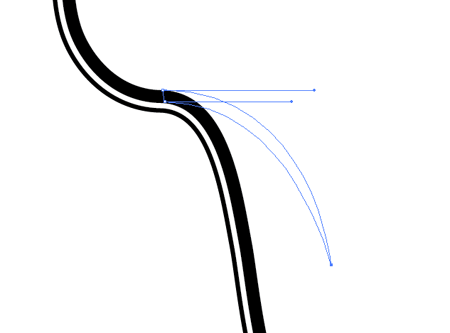
Use the Pen tool to draw a flowing line from the inner outline. Hold Shift while dragging the anchor points to produce accurate angles.
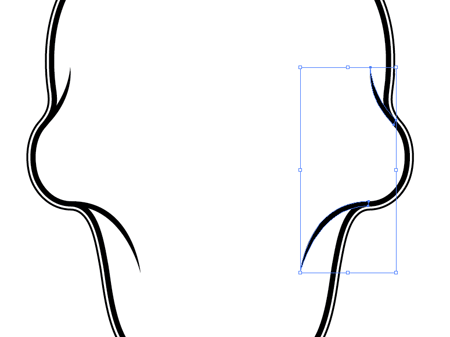
Duplicate these lines and go to Object > Transform > Reflect to position them on the opposite side.
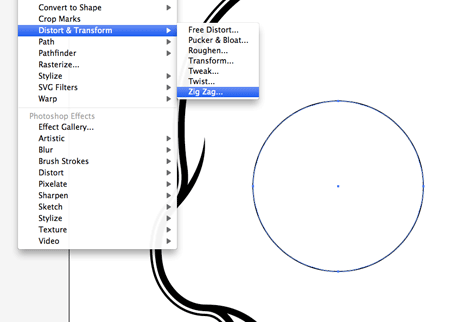
Draw a circle to represent the basic shape of an eye. Go to Effect > Distort & Transform > Zig Zag to edit the outline of the circle.
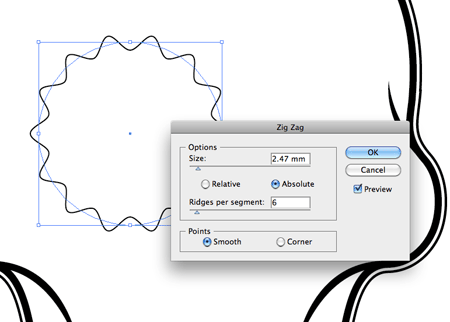
Change the settings to Smooth, then adjust the sliders to create a flowing wavy outline around the circle.
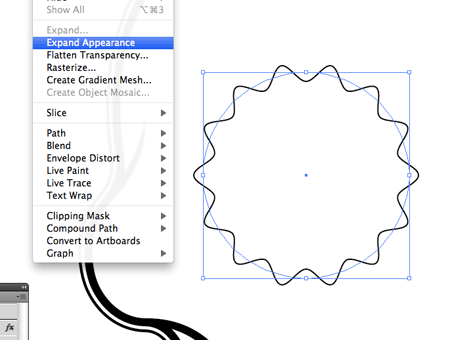
To confirm the appearance of the shape, go to Object > Expand Appearance. This will make the Zig Zag transformation permanent and allow the object to be used with the next step.
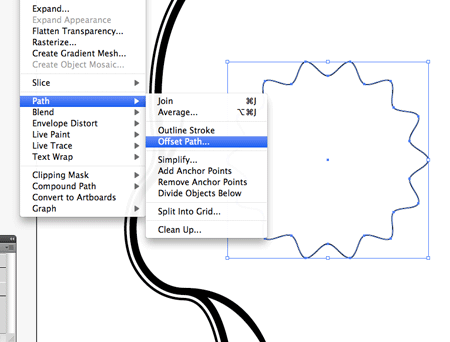
With the object selected, go to Object > Path > Offset Path. Enter 3mm in the options.
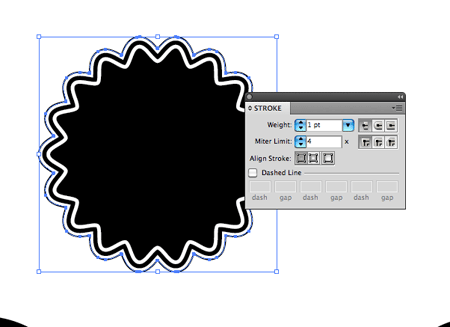
Repeat the process of adding an offset path a few more times, then adjust the fill and stroke of each item to produce alternating outlines. Use different stroke weights to add more detail.
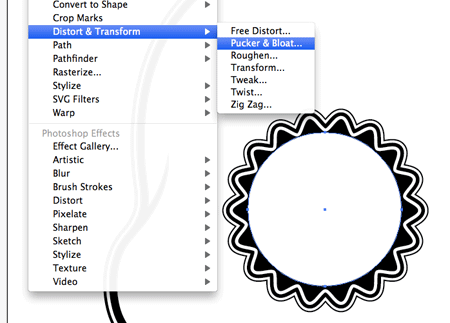
Add another circle to the centre of the wavy outlines. This time go to Effect > Distort & Transform > Pucker & Bloat. Drag the slider around 10% towards the Pucker side of the bar.
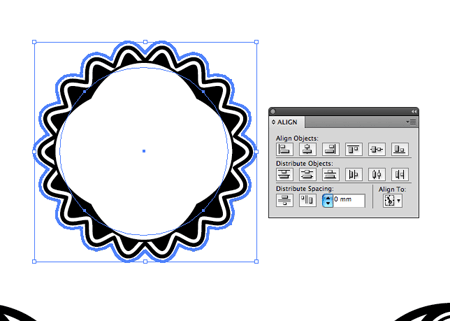
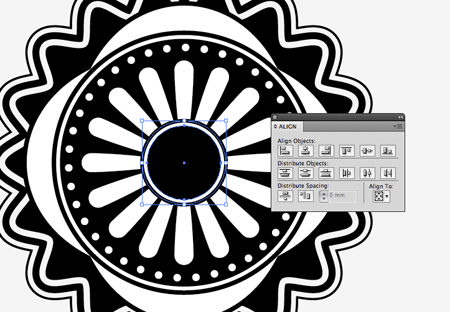
Use the Align palette to centre up the items. Shift-click both the Pucker shape and the wavy outline, then click the wavy outline once more to set this as the key object.
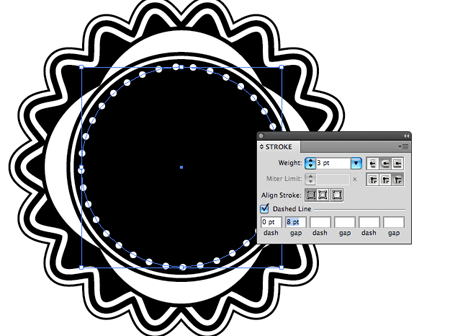
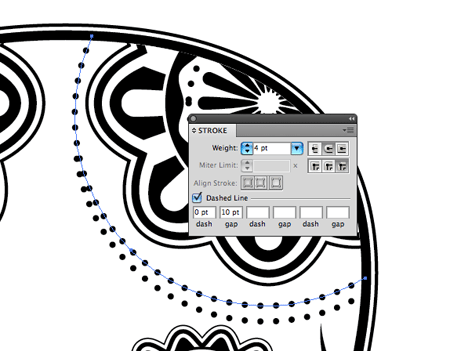
Continue adding more circles using various sized stroke and alternating colours. A series of dots can be created using the Stroke palette – Check the Dashed Line option, then adjust the dash to 0 and gap to 8-10pt. Make sure the Round Cap and Round Join options are set, then adjust the size of the dot by increasing the stroke weight.

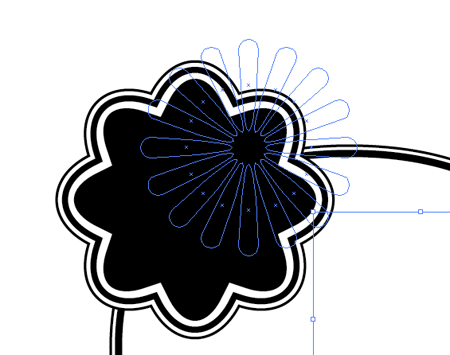
Draw a small white circle, then drag the lower most point downwards (hold Shift). Copy (CMD+C) and paste (CMD+F) this shape, rotate it by 180 degrees then move the duplicate vertically, leaving a small gap between the two objects.

Copy both items, paste, then rotate these duplicates by 90 degrees. Continue adding more shapes at 45 degree angles.
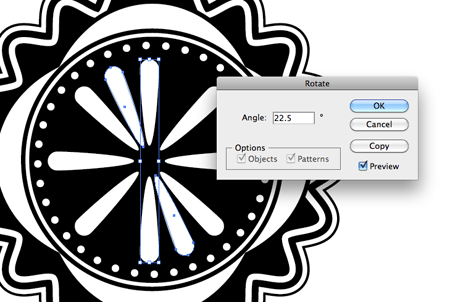
Paste another duplicate of the shapes, then go to Object > Transform > Rotate. Enter 22.5 (45 divided by 2 = 22.5) then finish off the pattern until all the elements are evenly spaced.
Two more small circles in the centre of the eye finishes off the detailed pattern nicely. Make sure everything is aligned using the Align palette. Group all these objects together (CMD+G).
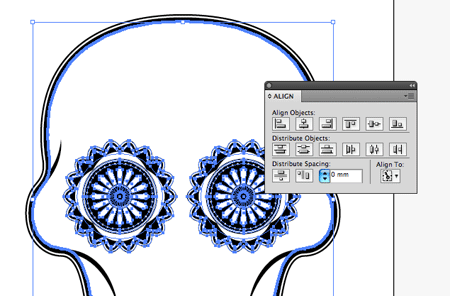
Make a copy of the eye and move it to the opposite side. Group both eyes together then align them with the main skull outline. Remember to select the skull outline as the key object by giving it an extra click. This will ensure the eyes move into place, not the outline.
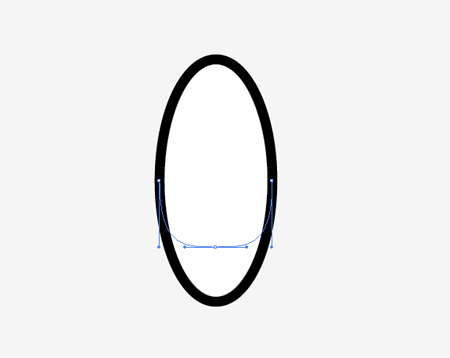
Elsewhere on the artboard draw an oval. Drag the lower most point upwards until the bottom edge is almost flat.
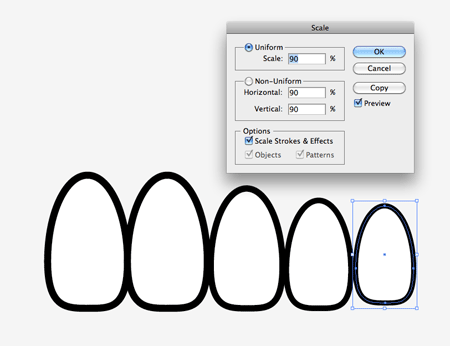
Duplicate this shape and butt it up to the previous. Scale each duplicate down by 90% (Object > Transform > Scale) and vertically align them all to the bottom.
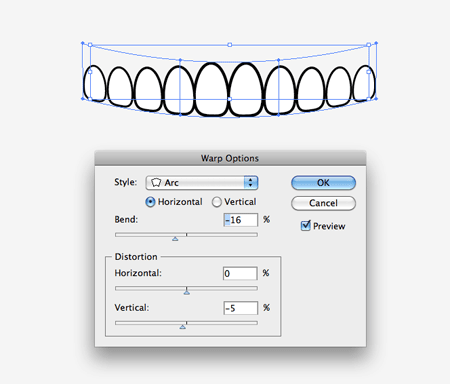
Select all the objects and go to Object > Envelope Distort > Make with Warp. Choose an Arc with a bend of around -16 degrees. Adjust the distortion to keep the outlines of the teeth running vertically.

Go to Object > Expand and select just the Object checkbox to make the effect permanent then make a copy. Add another Envelope Distort to the lower set, but this time bend them so they run parallel to the upper teeth. Expand the second set too.
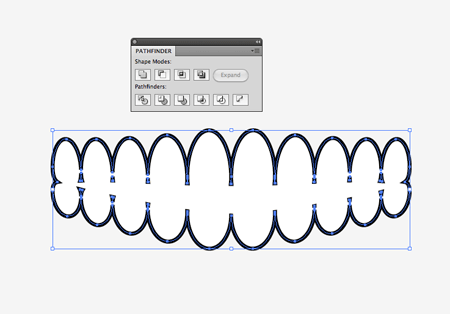
Make duplicates of the two sets of teeth, then merge these duplicates together with the Pathfinder palette. This merged version can be used to add a thick outlining stroke and an offset path.
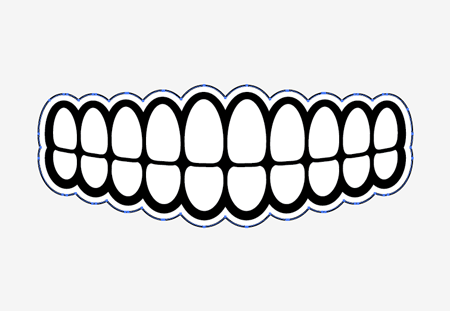
Send the thick outline and offset path items below the primary teeth shapes by repeatedly pressing the shortcut CMD+[. Group all the items together.
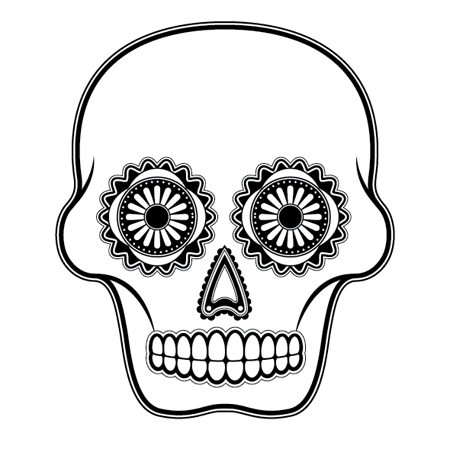
So far we have the eyes and mouth in place on the skull. Use similar techniques to create a nose. Begin with a basic shape, then add offset paths with alternating fills and strokes to build up the layers of detail.
Let’s build some pretty elements to decorate the skull. Draw a circle over the upper skull area, add a Zig Zag transformation, Expand Appearance then add a 3mm offset path. Alter the stroke weights and align them to the outside.
Copy the series of radial teardrop shapes from the eye graphic and scale them up for use in this decorative element. Align them so they overlap the white outline, creating a cool intersecting effect.
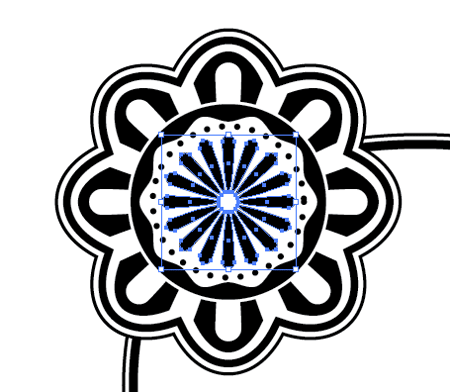
Continue adding circles and differently shaped elements to build up the detail. Duplicating items that have been used elsewhere speed up the process.
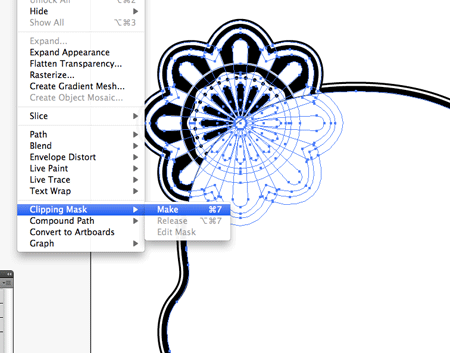
Once the decorative shape is complete group the items together. Make a duplicate of the skull outline (CMD+C – CMD+F). Send this item to the top of the stack (CMD+Shift+]), then use it as a clipping mask to trim out the excess from the decorative element.
Make a copy of the decorative element, then flip it using the Reflect transform option to position it on the opposite side.
Draw a couple of circles that flow across the upper skull area. Give these circles a dotted stroke. Instead of using a Clipping Mask, simple shapes like these can be clipped using the Scissors tool. Make intersections where the paths meet the skull outline then delete out the excess.
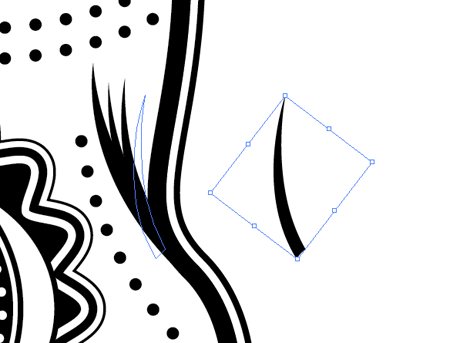
Make copies of the detail lines at the edge of the skull and rotate each one to form a series of shading lines.
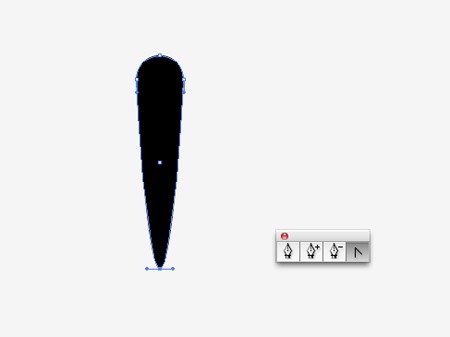
A teardrop shape can be quickly made by dragging the lower most point of a circle vertically using the Direct Selection tool. Convert the anchor point to remove the bezier handles and therefore creating a sharp point.
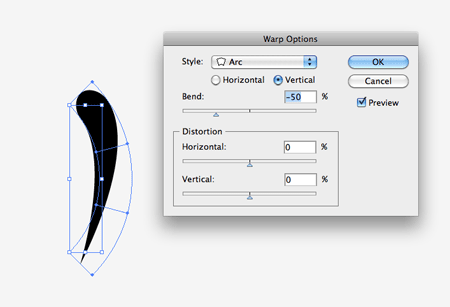
Variations of the teardrop can be made using the Envelope Distort tool. Add a Vertical Bend of 50%.
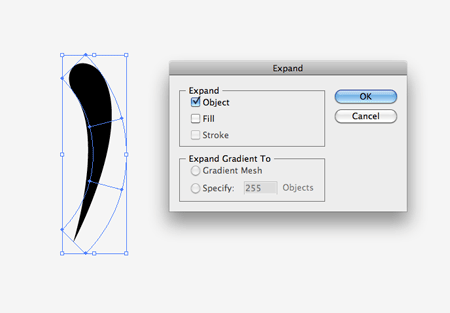
Don’t forget to permanently fix the shape by going to Object > Expand and selecting just the Object checkbox.

Scale and position these teardrop shapes across the skull to fill out the white space and provide extra decoration. Make sure each object is also replicated on the opposite side to make the skull perfectly symmetrical.
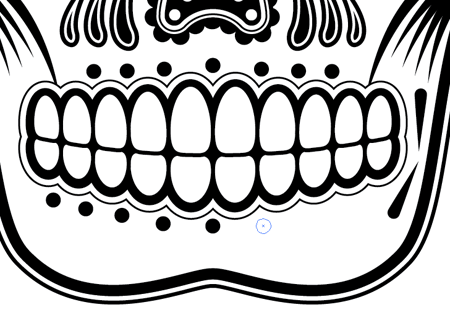
Objects as simple as a circle can be used to fill out other areas. Align little circles around the mouth to produce another pattern.
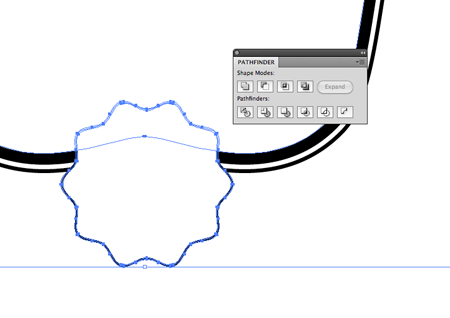
As well as using Clipping Masks and trimming shapes with the Scissors tool, shapes can be clipped to size with the Pathfinder Intersect option. Use a copy of the skull outline to clip out the excess from objects that extend beyond the edge of the design.
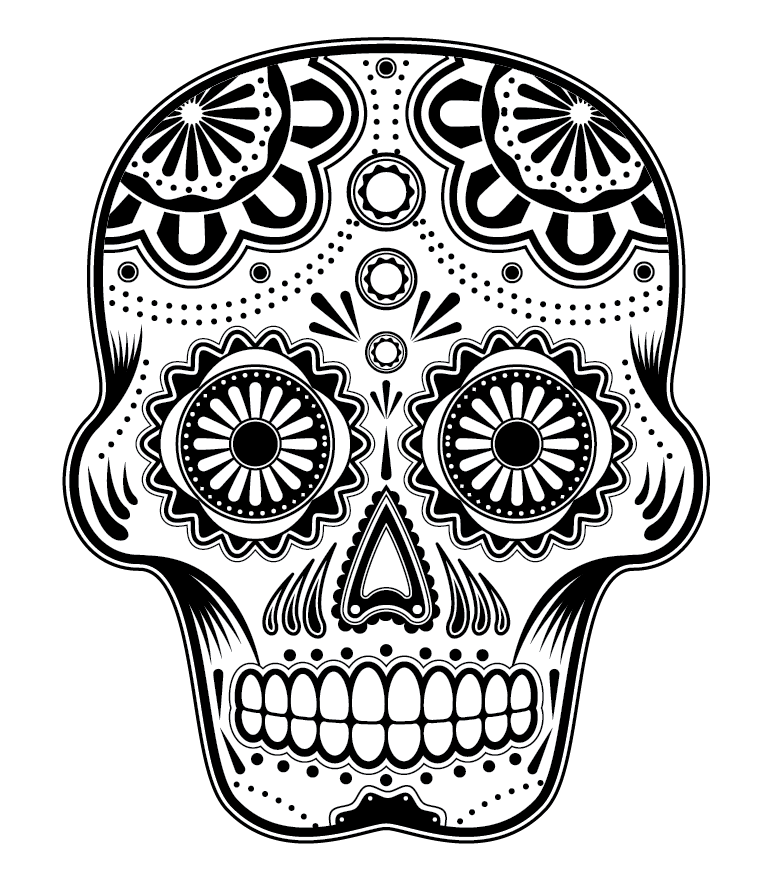
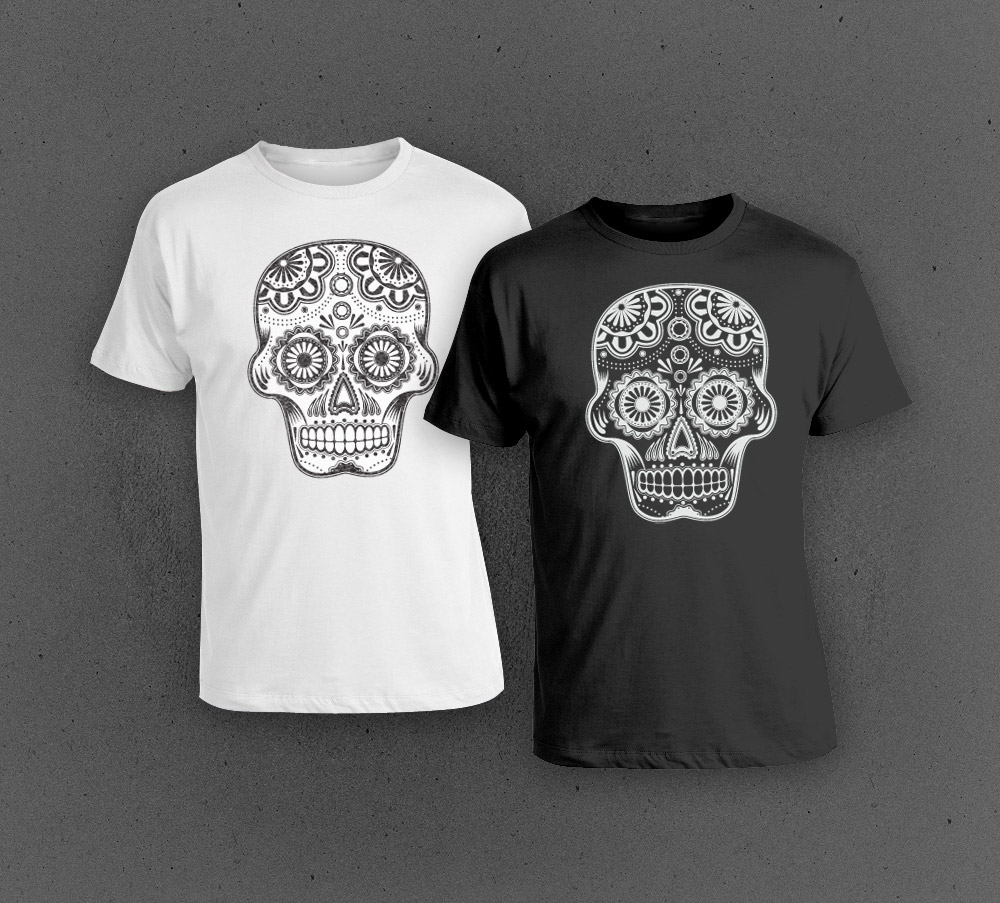
Continue adding tiny vector shapes and elements to completely fill out the skull until you’re happy with its appearance, or until you lose your sanity. The final sugar skull is packed with detail and ready for combining with other elements as a poster or setting up as a cool t-shirt print.

It look good in Tshirt. thanks for nice tutorial
You are just incredible! I am amazed!
sweeet tutorial. i was looking for some inspiration for t-shirt designs. thanx :)
Brilliant stuff, Chris… Now to grab the source file and to build a colorful environment around it… (I hope the .ai file is under the CC licence) :D
this is very cool! Thanks for that!
Cool tutorial! Maybe I get this one as a tattoo ;)
Nice tutorial!! Tanks.
sorry. Thanks
Brilliant stuff Chris!
Its again the same. You rock Illustrator (Chris)
Will definitely try this.
Thanks will try this out looks nice.
Awesome tutt, nice1!
Awesome tutorial, you’re always producing some very awesome designs. Keep it up!
thanks bro… I had an idea but because of u now i can do it!
This is one kick-azz tut! Your work is top-notch, thx for the detailed instructions.
Cool work God Gifted thank you bro
you r genius
thanks man
Great tutorial, very useful techniques. Tthanks for sharing
Aslamwalaikum,
First Happy Ramadan to you, and I would say Great work again dude,
I have been following your blog and all I can say again is, Awesome design.
Right now I’m trying to read all your blog enteries so may be I can learn. Just started touching CS3 :)
Lets hope for the best.
Great work again Chris
Great tutorial as always, Chris!
I like the design! It looks really funny , not at all scary :) nice tut Chris!
Great job. Nice illustrator work. Thanks.
Regards,
Al Kamal Md. Razib
As always, Great article chris ;)
Tnx!
This is a very cool tutorial! I love skull designs! Great job!
Fantastic tutorial!
You make it very easy to follow and learn these exciting techniques.
i think you should priview about way how to cliping mask, thats important for a newbie
Great tutorial as always. keep it up.
Marvelous! Awesome tutorial, very useful indeed. We as latinoamericans are influenciated a lot by the traditions of our lands, and it’s incredible that something as “native” as this trascends to people of other parts of the world, greetings!
TRU..
You are damn good Cris ,That was so perfect !
I have always been a fan of your tuts… this is one of the best! Amazing!
Chris, again one great vector tutorial here :) Thanks
Maybe some cool free vector sets for your artworks:
http://www.cruzine.com/2010/08/17/people-vector-sets/
I love your tutorial ,and u explain it so well ,i am trying to do tutorials like u ,anyway u have cool art work.
cooool tutorial
amazing and simple!
And now we gonna see Skulls everywhere !? hehe…
Its allways depending on ya own creativity..
Great stuff. Looks awesome on the shirts!
I love the presentation and the it was explained.
Thank you for the great tutorial. I love the detail in the scull. Looks awesome!
Nice! Such a detailed work. I’ll will try this one out. Thanks
super
thanks for sharing, nice tutorial.
This is awesome!
Never thought of this way for making some complicated patterns. thanks. :D
It’s beautiful, thanks Chris!
im obsessed with skulls right now…where do I buy this tshirt?
Hi, I live in Mexico City, so I think I know something about this topic, you’re a little confused, the kind of patterns that you draw are not like the candy skulls we have for day of the dead, it resembles more the engravings of Guadalupe Posada, a well known mexican artist from the beginning of the XX century. (that influenced the candy makers as well)… saludos!
Fantastic tutorial, thanks a lot!
Thank you for sharing this great post with us!
WebProject | Web Design
Thanks for this! It kinda consumed me for a few days, as I don’t have Illustrator, and I used it to learn Inkscape, but it was a fantastic tutorial. http://www.flickr.com/photos/cavalaxis/4962151086/
Nice skull ! Nice tut ! Big up
Seriously Chris, your tutorials are amazing. The skull looks great on a T-shirt too!
As always, cheers for the incredible post
realy nice tut. ;) TanX @};-