
This post was originally published in 2010
The tips and techniques explained may be outdated.
One of the great things about designing with vector shapes is that any design, especially characters, can be developed out of basic shapes, giving a simple and stylized style. Let’s get busy with Adobe Illustrator and design a cute bear character and surrounding scenery in just two colours, ready for use as a cool t-shirt design.
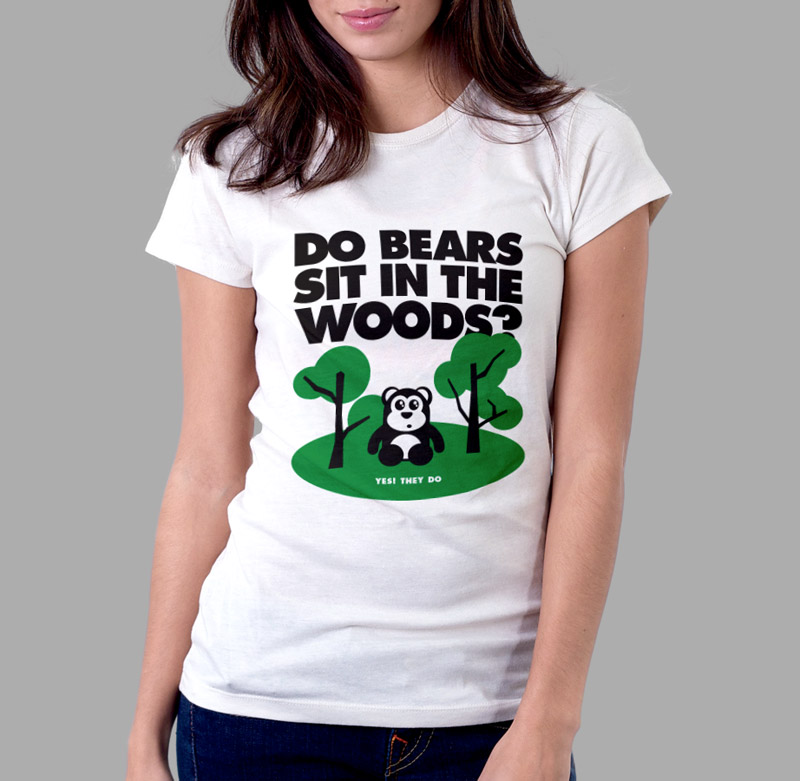
Here’s the design we’ll be building. It features a cute little bear sat peacefully in his natural surroundings, accompanied with the good old saying “Do bear s*it in the woods?”, but with a little twist of course! Often with textile based designs, you’re limited to a set number of available colours, especially if the design is to be printed using the popular screenprinting process. These are usually specified as Pantone swatches, so one initial task would be to open up your Pantone colour libraries from within Illustrator. Click the little options arrow in the Swatches paletter, then select Color Books and Pantone Solid Coated. From here you can select your chosen colour swatches.
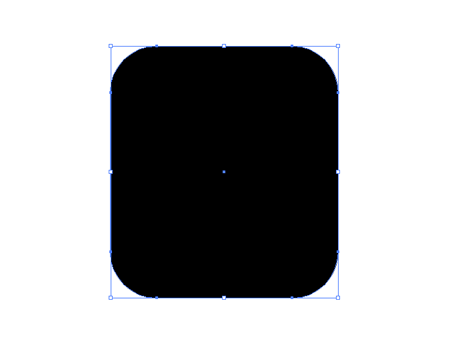
Start work in Adobe Illustrator and create a new document. With vector artwork having the advantage of scalability, the initial document size isn’t too important, but a rough size of 11×11 inches will then allow you to tweak the size according to any printer’s templates. Draw a rounded rectangle onto the artboard and adjust the corner radius while dragging with the keyboard cursor keys.
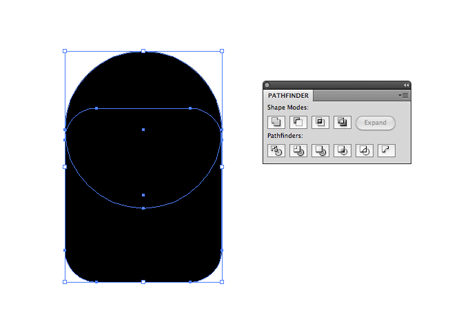
Next, draw a perfect circle to the exact width of the rectangle and overlap the upper most corners. With both items selected, use the Unite option to merge the two together.
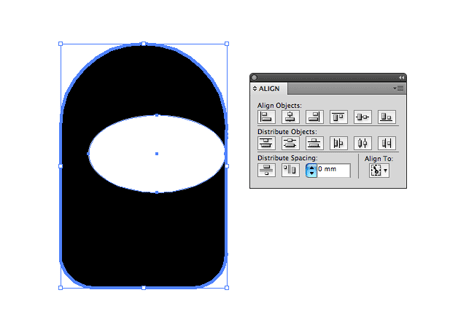
Draw a white oval over the two previous items, then use the align palette with center everything up vertically. Giving the main body an extra click while selecting the objects will center all objects to this shape (indicated by the thick blue outline).
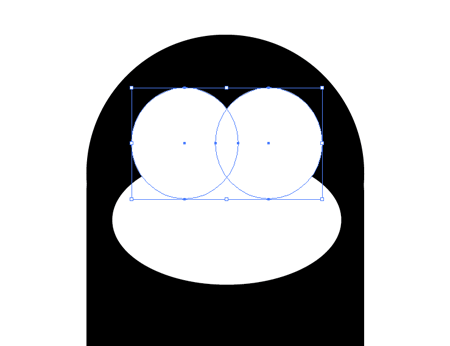
Draw an extra circle that overlaps the white oval, duplicate this shape and move it to the opposite side.

Continue drawing circles to produce an eye. Using just a large black circle with two smaller highlights should do the job. Group the eye, then duplicate and move to the other side.
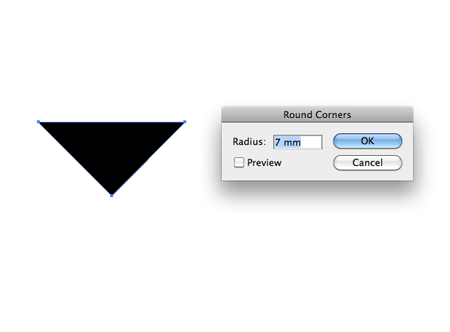
To create the nose, start with the Star Tool, and press the down cursor key while dragging out the shape to limit the points to three. Adjust the shape slightly by moving the end point with the Direct Selection Tool, then add some round corner styling by going to Effect > Stylize > Round Corners.
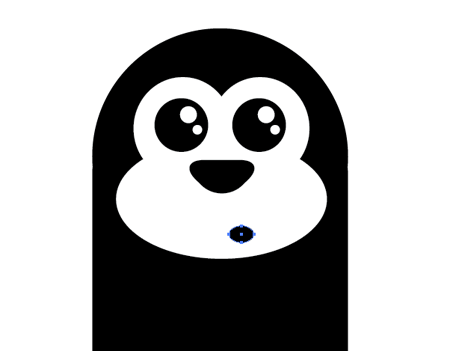
The bear’s face is coming along nicely; Finish it off with a small oval to form a curious mouth.
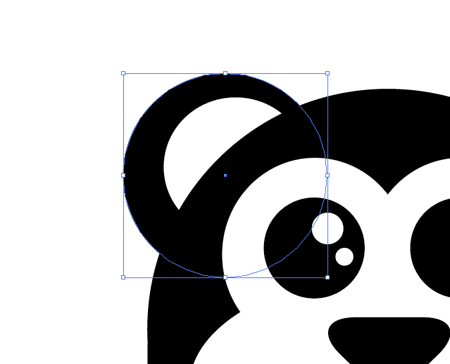
Draw a couple of circles, one in black, and a smaller circle in white to form an ear. Press CMD+[ to alter the stacking order of the objects and send the ears to the bottom, so that they peek out from behind the main head outline.

Copy and paste the ear, then go to Object > Transform > Reflect and position on the other side of the head.
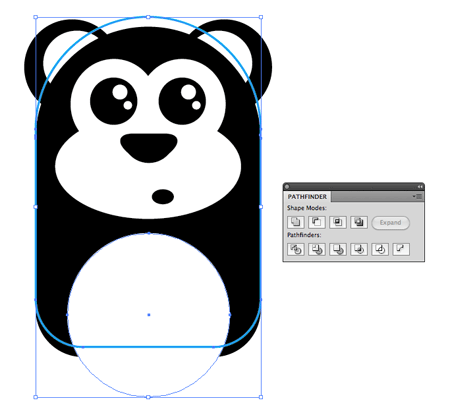
Draw a large white oval to form a belly for the bear. Center everything up, then duplicate the main body shape. Send this shape to the top and move it upwards a few nudges, then with the belly oval selected, click the Intersect option from the Pathfinder to trim out the excess.
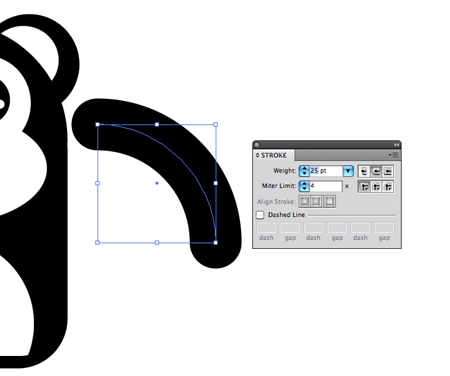
Draw an arm by starting with a large circle. Use the Direct Selection tool to delete out two of the four points, to leave the path of a quarter-circle. Adjust the stroke to around 25pt and select the round cap option. Send the arm to the bottom of the stack using the shortcut CMD+Shift+[, then duplicate and reflect to the opposite side.
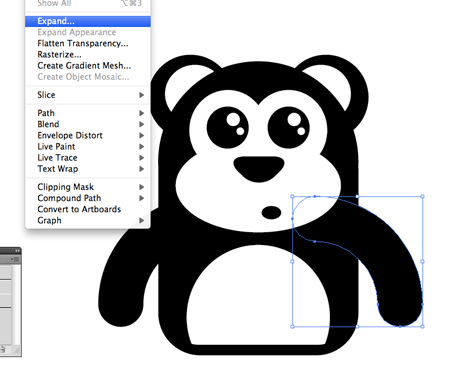
The arms are still made out of paths and strokes, so select each one and go to Object > Expand and select just the stroke option. This converts the outline into a solid shape.
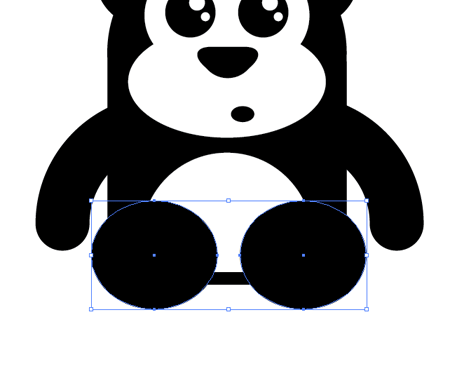
Finish off the bear by drawing a couple of ovals to represent the feet of a bear sat down. Remember to align everything up vertically so that the bear is symmetrical.
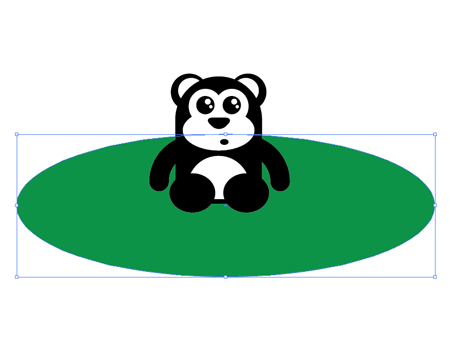
Start work on the surrounding scenery with a large green oval and position centrally and at the bottom of the stack.

Using the Pen Tool, roughly draw some abstract tree shapes using a black swatch. Start with the trunk, then create randomly shaped branches.
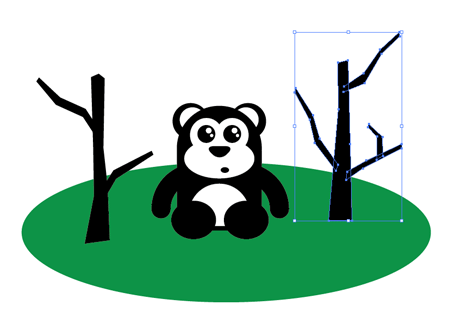
Continue drawing trunks and branches until you have a couple of tree shaped filling up the background.
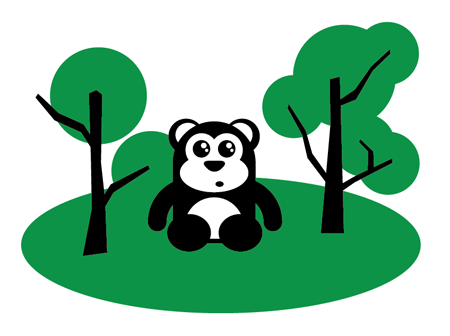
Use a range of green circles to represent the leaves and greenery of the trees by positioning them around the branches.
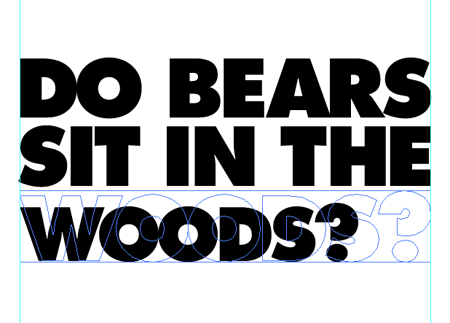
Next, add a little slogan to the design. Here I’ve typed out a fun little message in Futura Extra Bold and converted to outlines (CMD+Shift+O) to enable more advanced editing as if the letters were shapes. Using guides, scale up the words so that their edges are flush.
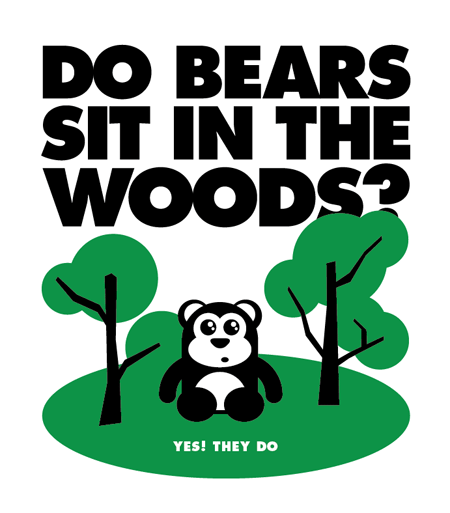
Move each item into place to finish off the design. Masking off the lower portion of the typography behind the trees helps unite the two elements of the design.
All that’s left is to select all (CMD+A) and group everything together (CMD+G) ready for exporting the final vector file or PDF.
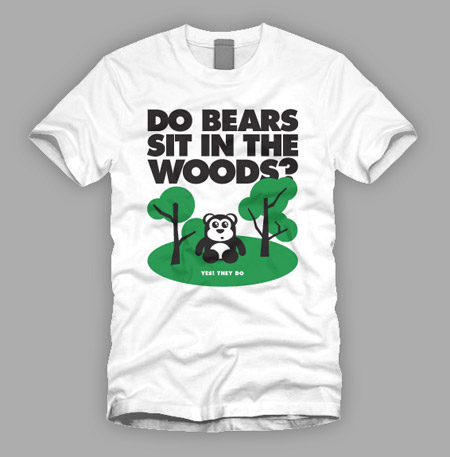
Mock up your T-shirt designs with PlaceIt
Upload your artwork to hundreds of ready-made mockups on PlaceIt to simulate how your design will look on a real T-shirt design!
T-Shirt Mockup of a Woman Relaxing

Basic Tee Hanging on a Concrete Wall

Mockup of a T-Shirt with a Copper Hanger

Very easy to follow. nice post
nice tut.thanks.
Very cute and easy indeed – many thanks!
Looks awesome – gonna have to try that :)
Nice post! Thank you
What about color separations?
Regardless, nice tutorial!
On the odd t-shirt designs I’ve done for real the printer has always taken care of separations. But true, it would have been a handy bit of knowledge to include.
Excellent tutorial (as usual) Chris! Stumbled, dugg, bumped, moo’d and bookmarked on delicious :)
it’s a nice tutorial and design, specially the color combination…. very informative for all.. thanks to sharing like that post.
Really nice tutorial and easy to follow. Thank you!
Nice tutorial. I love finding these when they are this easy to follow. Saved and Bookmarked.
So simple but so NICE! =)
That’s is super cute! I love it. Can you send me one of the shirts if you print it? Great job Chris, keep it up
It’s looks good…….with cute smile…..
Great, Awesome :D
Where’s the t-shirt? Someone will need the link to buy it because it’s so cute. Clicked all the social bookmarked! Great job!
You have spelt “Do bears sit in the woods” as “Do bears s*it in the woods” just under the picture of the woman wearing a the t-shirt.
Just gives another impression of what it could mean ;)
I’m not sure how far the saying spreads, but the original I know of actually includes the expletive. My version is a comedy twist using the word ‘sit’ instead (making it a little more family friendly!) http://is.gd/67kXp
More! We want more vector tutorials like this one. Nice tutorial Chris, and good for Illustrator beginners like me.
Very nice tutorial, check my site to see my result, I also linked to your site:) And like DI above me, more of this please, I’m working for a little time now with adobe illustrator and always want to learn more
cool, simple and fun stuff! loving the green! Thanks Chris :)
Your bear is so cute!
Simple & cool tutorial. Great work!
Excellent tutorial Chris… Well explained and done… The final outcome is awesome… Keep up the great work.
-Deepu
I like how you made the glow in the eyes. Thanks!
thank you admin likes
ı love you blog.spoongraphics.co.uk thnaks
This sort of tutorial is so valuable for those of us who are learning to overcome our deeply held mistrust of the pen tool. It doesn’t have too many steps, it’s clear, it covers important principles and it has a fun outcome that can be adapted to suit the user. Thank you.
This sort of tutorial is so valuable for those of us who are learning to overcome our deeply held mistrust of the pen tool. It doesn’t have too many steps, it’s c
Great as always.
I have a question though. I want to print some t-shirts myself. Where do you print yours? And are there any sites or companies that you can recommend? Thanks
All the t-shirt projects I’ve worked on have been just supplying the design, so I’m not too knowledgeable on where to get things done.
Saying that, I’m sure there will be some local printers who have a screenprinting setup, otherwise there’s always those ‘print on demand’ type websites, although I couldn’t advise on their quality.
really cool tutorial thanks for the tips!
I really like this. Very easy to follow. U think you could get into some 3d with illustrator. Just an idea. I would like to see your approach.
I just found a big collection of online T-Shirt stores on Smashing Magazine. I’ll try my luck there.
Thanks for the quick answer. Cheers
Wonderful bear. The best present for girl.
very good source please more
Tutorial added to thewebtuts.com
great tutorial. i will try this
The bear has a really good head !
Thank you for this tutorial
How did you get your final image of the bear and forest on the t-shirt? Where did you get the stockimage of that model and the t-shirt?
Ha nice tutorial.. I usually don’t comment on tutorials but I completely cracked up at the slogan on the T-Shirt, I actually want one of these for a future podcast on P2L LOL! Nicely done.
Dan
Wow nice tutorial Chris,
Very simple tutorial and great for beginners!!
so cute! simple, useful technics. thank you chris..
This is so cute chris, very nice one. I love it. U rocks as usual.
nice tutorial for beginners
So cute techniques to follow.
Cute thought . Very simple and nice.
I love the cute shirt..
Very Nice!
Tried this. Awesome! Thanks!
Nice Work And Great …