This post was originally published in 2007
The tips and techniques explained may be outdated.
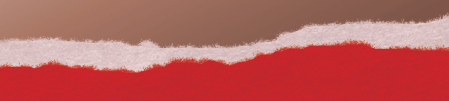
Torn paper is one of the key elements to achieving the distressed / collage look. This tutorial covers a few simple steps in Adobe Photoshop to create a realistic looking torn paper effect taking you on your way to Destroying the Web 2.0 Look!

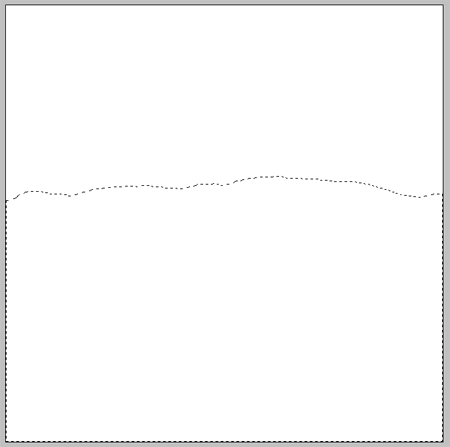
Start with your blank document in Adobe Photoshop, use the Lasso Tool freehand to create the outline of the torn edge and continue the selection across the lower half of the document.
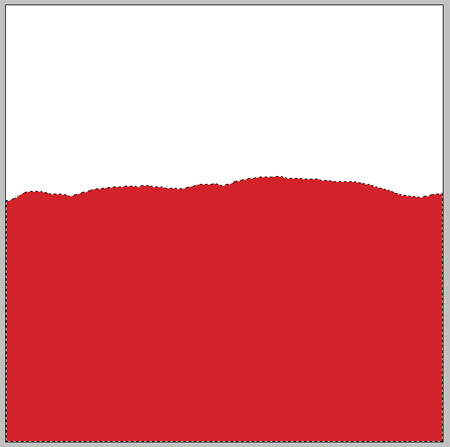
Select an appropriate colour for your paper and fill the selection on a new layer.
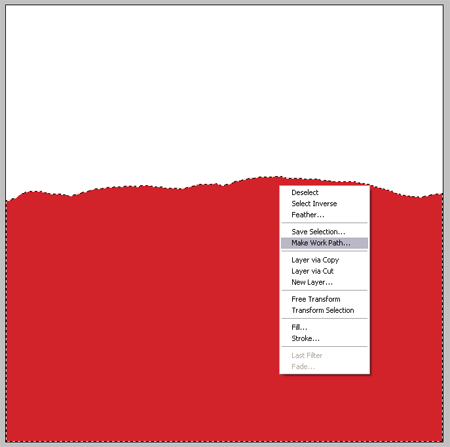
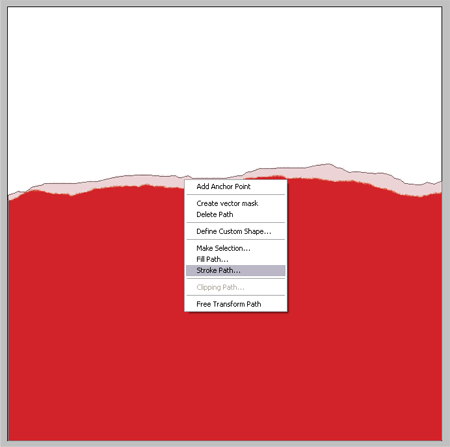
With the Lasso Tool still selected, Right Click (CMD-Click) on the mask and select Make Work Path from the menu. Change the tolerance to 1px to keep the path close to the original mask.
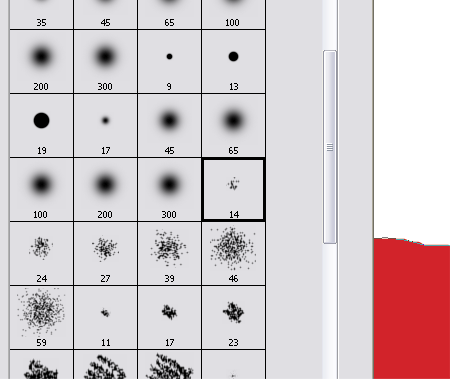
Select a brush shown above from the Brush Tool Menu, depending on the size of your document you may require a larger/smaller brush.
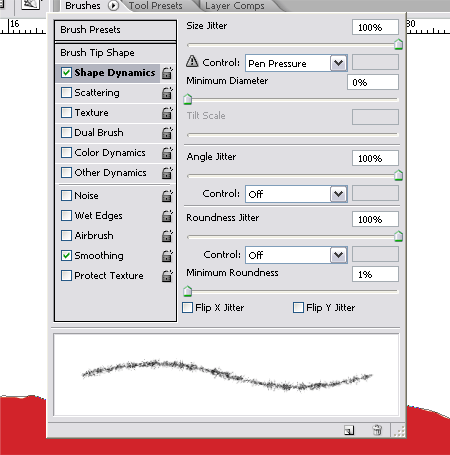
Head over to the Brush Options window, change the Shape Dynamics settings as show to create a fibrous stroke. For more information on the Brush Options window take a look at my previous Photoshop Brush Tip.
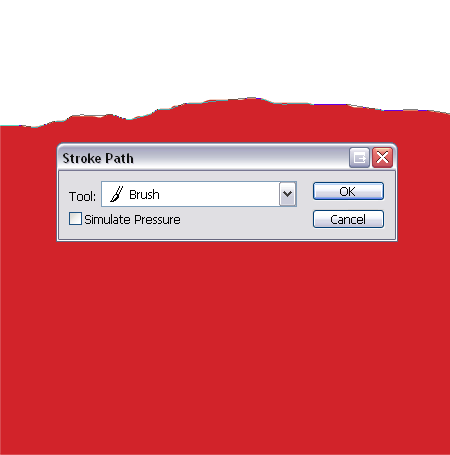
Back with the Pen Tool or Path Selection Tool Right Click (CMD-Click) the path and select Stroke Path from the menu. Ensure the Tool is selected as Brush from the drop down and Simulate Pressure is off. Repeat this again if necessary to produce a realistic amount of stray fibres from the edge of the paper.
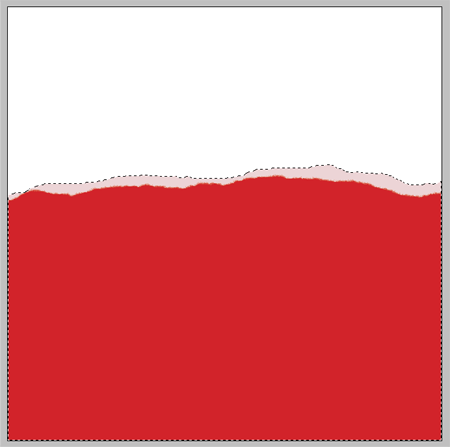
Paper is often made up of several layers which can become exposed when torn, to make the torn paper effect realistic create a another freehand selection using the Lasso Tool.
Fill this selection in a much lighter tint than the first colour on a new layer.

Make this the new Work Path by Right Clicking (CMD-Click) with the Lasso Tool.
Your brush settings should still be in place and appropriate colour selected, go ahead and Stroke the Path using the Brush option to produce more fibrous particles.
This produces the basics of the torn paper, but paper is more than jus a block of flat colour. To make it more realistic we need subtle texture and creases.
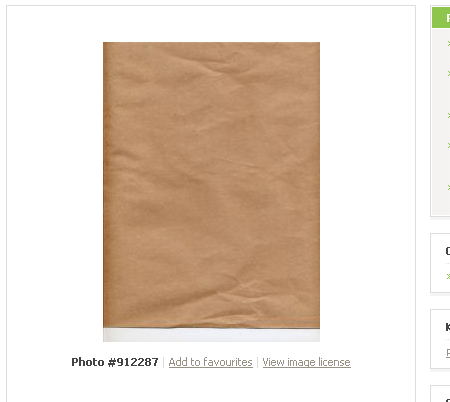
Download a Paper Texture from a stock photography website, the one I have found is free from Stock XChange.
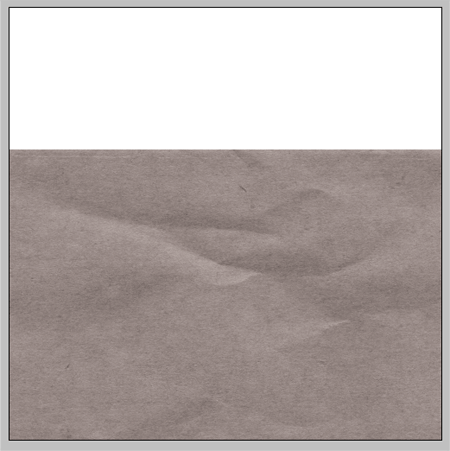
Paste the texture into you document and desaturate (Image > Adjustments > Desaturate) to remove the brown colouring.
Change the blending mode to Multiply to render the light areas of the image transparent.
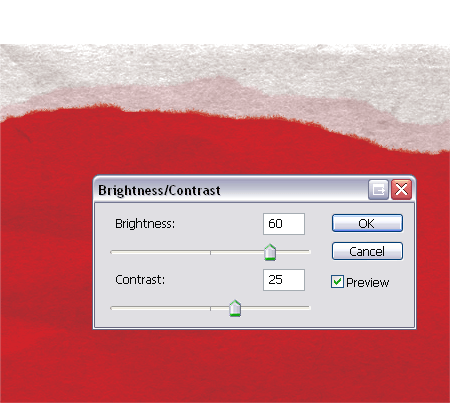
The texture is way too overpowering so adjust the Brightness and Contrast (Image > Adjustments > Brightness/Contrast) to tone down the effect.
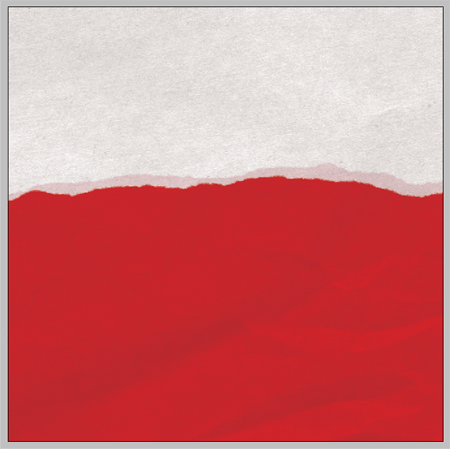
Move the layer around to find an interesting section with plenty of creases and texture.
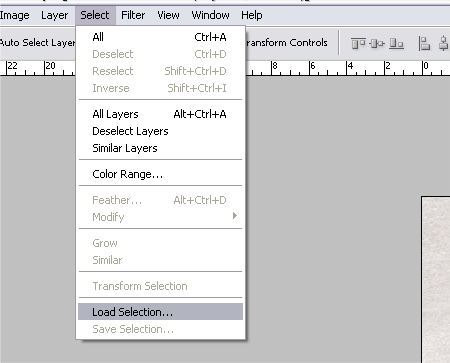
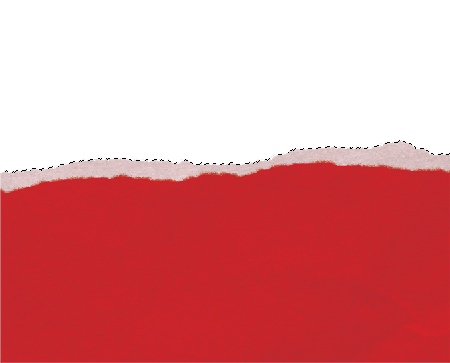
Delete the unwanted areas from the texture by selecting your lighter coloured paper layer, go to Select > Load Selection.
Inverse the selection (CTRL/CMD + Shift + I) and delete the selection from the texture layer.
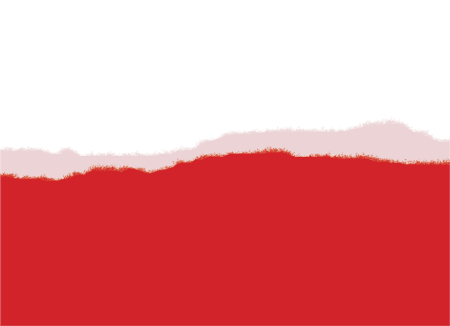
Merge your layers and add the new paper texture to your designs, notice the tiny fibrous edges and subtle texture up close which together give effect a realistic paper look.

Nice!
I did a similar one a while back:
Photoshop Page Tear.
Hey Adrian
Great site you have there, bookmarked!
Chris
I find this tutorial very interesting but I can’t quite follow some of the steps and I can’t see why… I have Photoshop CS version. For instance:
-“With the Pen Tool or Path Selection Tool Right Click (CMD-Click) on the mask and select Make Work Path from the menu. Change the tolerance to 1px to keep the path close to the original mask.”
I do that but I don’t get the same menu, I get one that starts with Create Vector Mask on it, and the options in the menu are not even selectable. And, when you say “mask”, what are you referring to? I’m lost…
I wish you can help me because I like the result, this is very interseting. Thank you very much in advance.
Hi Peter
It seems that’s my mistake, the correct tool to use is the Lasso Tool whilst Right Clicking, not the Pen Tool as I stated.
Post edited!
Chris
Nicely done! Good job on the feathered, torn edge – very realistic looking.
Very nice idea, I like this. Great website too. :)
I’m sorry, I guess this must be too advanced for me, but I still can’t pass from that same step and I’ve been trying for half an hour and looking at Photoshop’s help.
I still can see no menu with “Make Work Path”. I know how to make a new path from the Paths pannel but that’s all. I don’t know where I have to “Change the tolerance” and I don’t even know which is “the original mask”. Thanks for your help though.
No problem Peter, I’ll try and help you out.
The mask is the outline of ‘marching ants’ that you created by drawing the torn edge shape with the Lasso Tool.
With this tool still selected right click (or Apple-Click on Mac) on your document – this should bring up the menu you need.
Alternatively, you can get the same result by heading over the the Paths palette, click the small arrow in the top corner and select the Make Work Path option from the flyout menu.
Let us know how you get on!
Chris
Chris, thank you so much for being so helpful and patient. I already knew what a mask is in Photoshop, I just didn’t know which mask were you referring tobecause I was not getting the right results. OK, I found out what the problem is, not your fault. I have just found out my graphic pen has some sort of bug with Photoshop CS and it doesn’t give me some of the menus when usen right click. I usually have no problems with this but it seems that for some stupid reason it doesn’t give me the right menu, but a different one that starts with “Layer Properties”, so there was no way I could follow your steps. I have to investigate more about this bug, but I can make it work by using the mouse.
Thanks again, I’m going to go ahead with this torn paper thing :)
This is useful! I’m gonna try it now! Thank you so much! :)
Chris! thanks, Can you believe that I have always want to do that torn paper effect? with limited success :/. Your method is great looks very realistic.
That’s an awesome tutorial, I’m glad I stumbled by. Will definitely give this technique a whirl and see how I can use it in my work.
it’s great if you add a new layer above your main torn paper, then CTRL-click on the lighter layer, then CTRL-SHIFT-I and fill the new layer with another colour. Then, to make it look like two separate pices of paper, duplicate the paper texture, move it about a bit, CTRL-SHIFT-I again and delete the bottom bit of the NEW texture.
Ace tutorial, well worth the trouble to get Vista to subscribe via RSS *sigh*.
–Isaac
Great tutorial. I’m always looking for great paper resources for backgrounds. Now I can make my own. Thanks.
This is Great! I really love it!
Don’t think I’ll be able to do the same thing in Photoshop Elements, though… :-(
I’ll give it a try anyway!
Thanks!
Great tut!
Thanks for sharing (and for the link to the web 2.0 article – nice)
Yes, excellent tutorial. Thanks for sharing this :-)
Great Tutorial!
This is the best and most useful tutorial for realistic paper effects I’ve seen on sofar on the web.
Cheers Kirsten
What a great tutorial – been meaning to learn how to do this for ages. thanks.
This is an awesome tutorial. Thanks man.
Cheers :)
great tutorial!
helped me a lot
:D
Very simple and easy way of guiding :-D
Hats off
carino!!!!! grazie della dritta
Hi! I simply love this tutorial!!! GREAT!!! I’ve been wanting to know how to make a torn paper. Great explaining! :-D
You have amaging great mind to create that type of realistic effect.
Thanks you very much for teaching thease type of effects
god bless you
Great tutorial! Thank’s
A good man would prefer to be defeated than to defeat injustice by evil means.
hey this is a great site…who ever gets to find this r lucky i must say…te steps r really easy to undst…thanku so much..
cheers
niceee but actually… right clicking on a mac i ctrl click, not cmd click!!
i meant ‘is’, not ‘i’.
Hmm, I really like this effect and have been wanting to use something along these lines for a site I’m working on. However, I can’t find the brush options menu. I’ll admit, I’m cheap and am still working in PS 6.0, it’s actually called Paintbrush. If there’s a non-shortcut way to this menu could you point me to it? Or let me know if it’s a lost cause in my case? Thanks
Alternatively, you can get the same result by heading over the the Paths palette, click the small arrow in the top corner and select the Make Work Path option from the flyout menu.
Sergio
What a great tutorial – been meaning to learn how to do this for ages. thanks.
Wow, this looks really cool. Thanks for the effects!
Great tutorial, thanks for it. Nice blog…
Nice tutorial =)
it’s great if you add a new layer above your main torn paper, then CTRL-click on the lighter layer, then CTRL-SHIFT-I and fill the new layer with another colour. Then, to make it look like two separate pices of paper, duplicate the paper texture, move it about a bit, CTRL-SHIFT-I again and delete the bottom bit of the NEW texture.
Great Tutorial. Love the design of this blog.
Photoshop works miracles, thats for sure. Nice tutorial!