This post was originally published in 2008
The tips and techniques explained may be outdated.
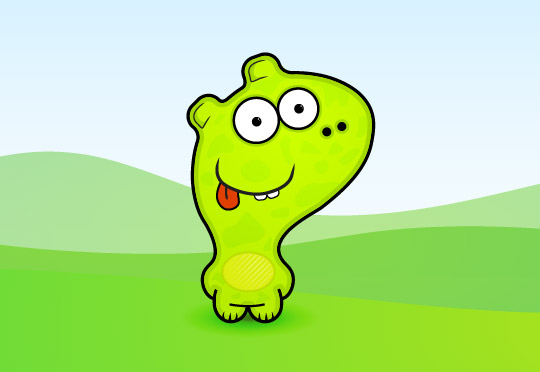
I guess with recent topics being based on vector illustrations and cute characters, it's about time for another Illustrator character tutorial. Previous versions saw the creation of Captain BlackSpoon and Freddy the Fish which seemed pretty popular, not to mention the quick and simple monster series. This time follow this Adobe Illustrator walkthrough on the creation of a cute little vector monster character, beginning with a quick pencil sketch on paper.

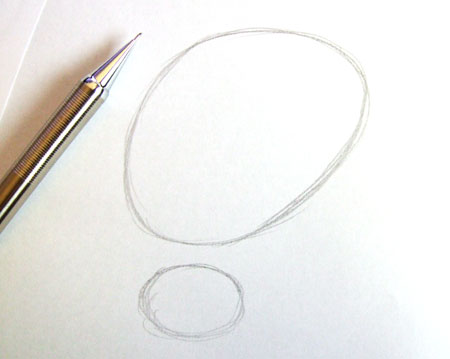
Starting with paper and pencil, sketch out the rough shapes with quick and dirty circular shapes. With reference to the head in particular, don't worry about drawing a perfect shape – the disproportionate features is what I think makes this monster so cute.
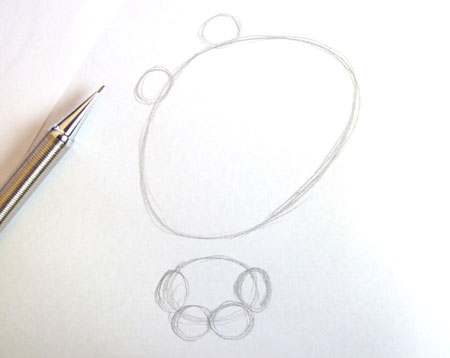
Sketch in some additional circles to plan out the limbs and ears.
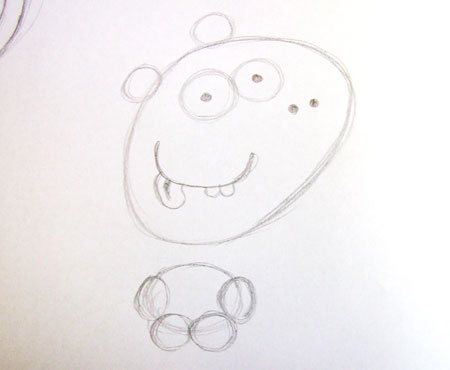
Continue to draw in the facial features, large eyes and a drooling tongue are a must.
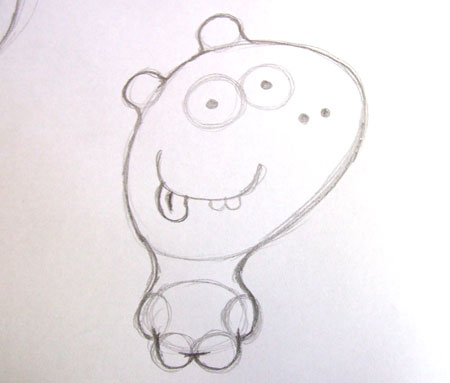
Concentrating more on the overall form and shape of the character, outline the building blocks to develop the body.
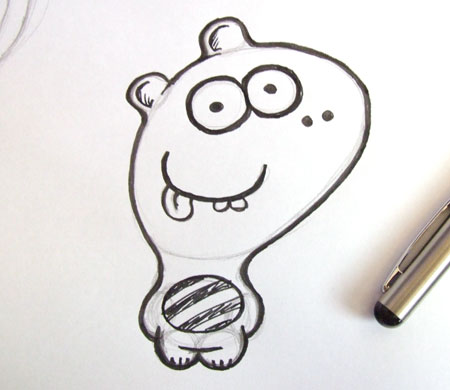
I like to go over any final pencil marks with a black marker to give a better view of how the illustration is looking, this also helps when it comes to scanning or photographing the image for tracing.
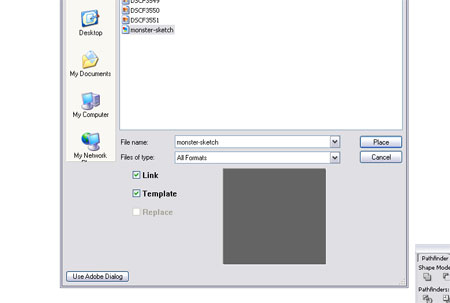
Open up Adobe Illustrator and create a new document. Under the File > Place document select a scanned or photographed image of the initial sketch. Select the Template checkbox to set the image as a locked translucent picture ready for tracing.
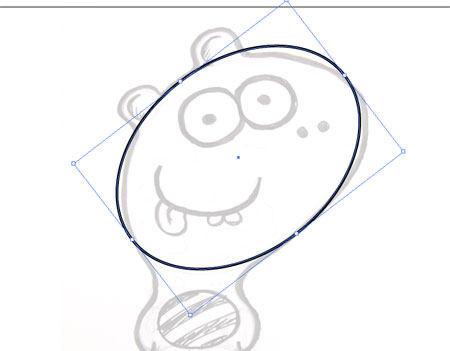
Begin with an oval using the Circle Tool to outline the rough shape of the head.
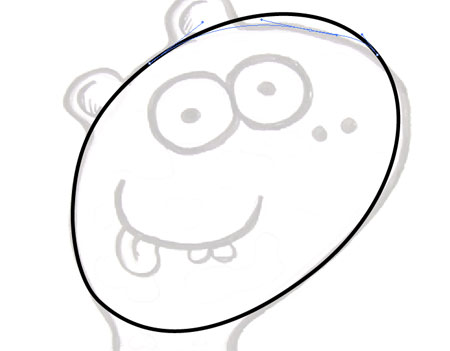
As mentioned before, the disproportions of the monster is what adds to it's character, use the Pen Tool to add in extra points and move these into position with the Direct Selection Tool to rough the oval into a more inaccurate shape.
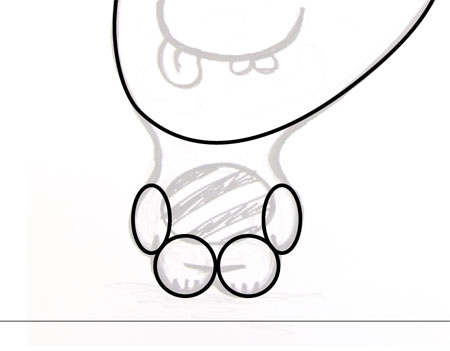
Just like when sketching out the character, add in building blocks to make up the body shape.
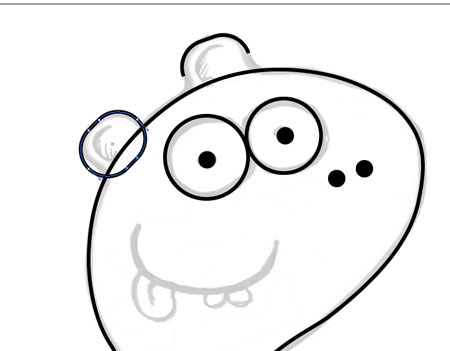
Use Rounded Rectangles for the ears and rotate into place.

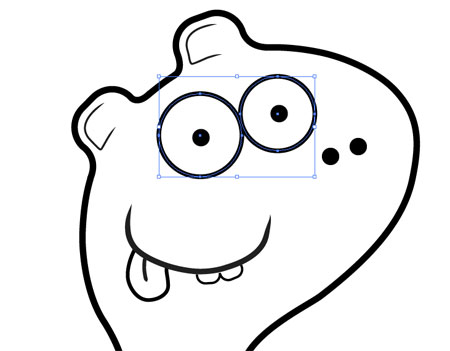
The eyes and nose are simply made up of basic circles, draw these up and move into position.
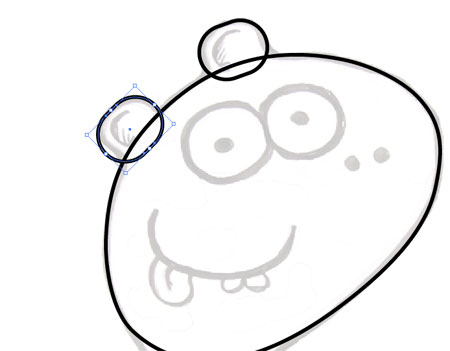
The head shape needs modifying to allow it to merge into the body. Using the Pen Tool add two additional points where the shape begins to stray away from the initial sketch. Use the Direct Select Tool to then delete the excess area leaving an unclosed path.
Use a similar process on the ovals than make up the limbs, this time the use of additional points isn't needed, simply delete one of the existing points to alter the shapes.
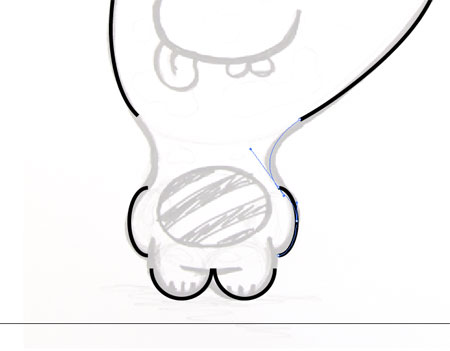
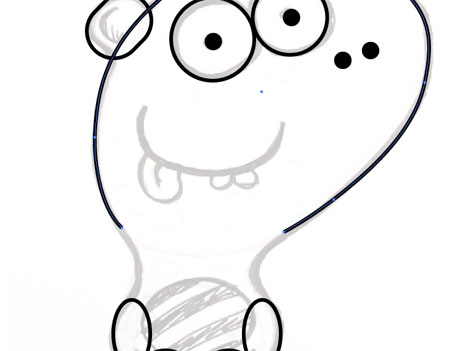
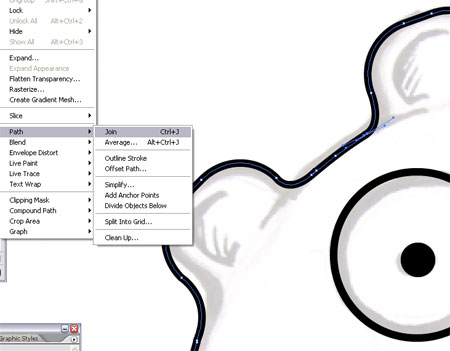
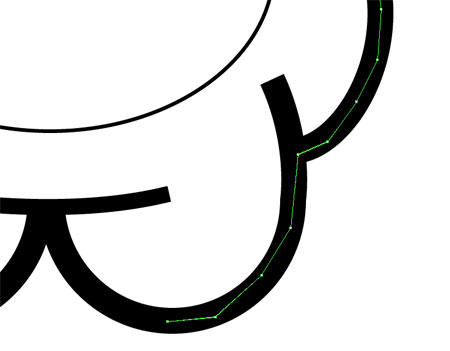
Back with the Pen Tool, hover over the unclosed path of the head and notice the icon with a minus sign appear, continue to click and drag the path following the curvature of the neck. When you reach the top of the arm look out for another icon change, this time a little circle that indicates that you will be joining the path.
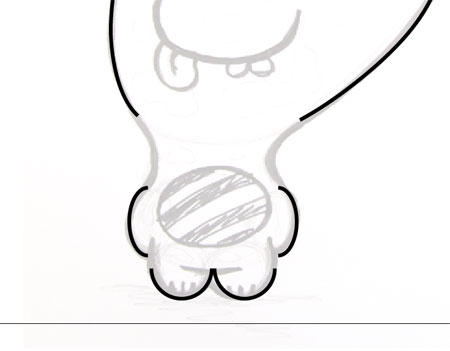
Extend the paths of the other limbs to give a complete outline of the monster character.
Use the Direct Selection Tool to delete out the lower two points of the rounded rectangles.

With the Pen Tool use the same technique to extend the paths to merge into the head.

Select the shape that makes up the head and add points at the areas that intersect with the ears.

With the Direct Selection Tool delete these additional points to remove the line that cuts right through the ears.
Select the points of the two separate pieces (ears and head) in individual groups of two and press CTRL / CMD + J to join them together into a single shape.
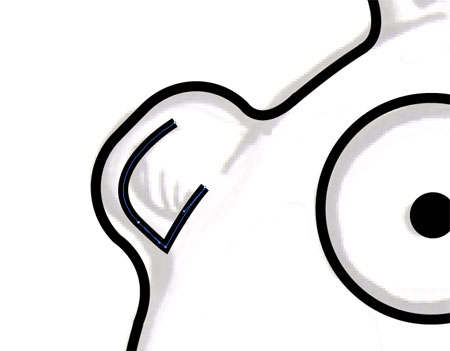
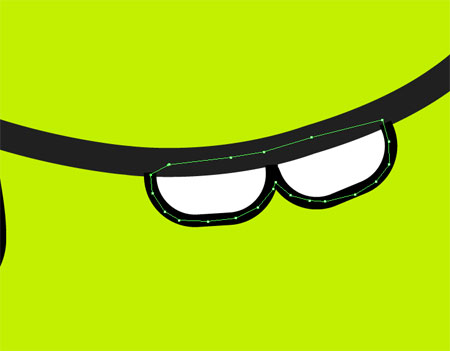
Add a little detail to the ears with the Pen Tool, simply clicking and dragging a shape into place.
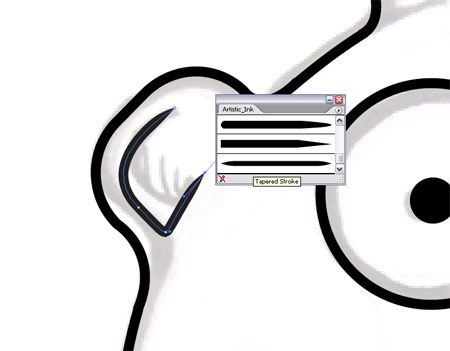
Open the Artistic-Ink brush library from the Brushes Palette and choose a nice tapered effect to remove the square edges.
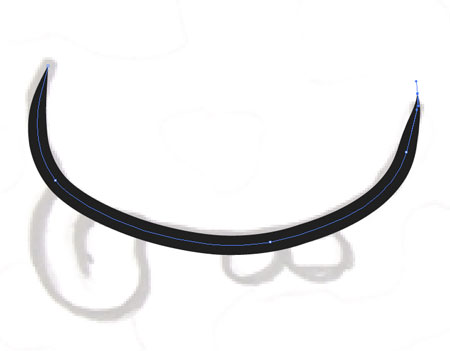
Using the same brush preset draw in the mouth dragging in the rough shape with the Pen Tool.

Also draw in the shapes that make up the tongue and teeth.

Draw in a simple oval to outline the belly area.
At this point the visibility of the sketch layer can be toggled off to view how the illustration is looking and to tweak any points with the Direct Selection Tool.
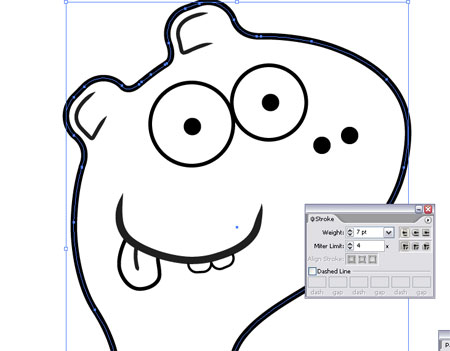
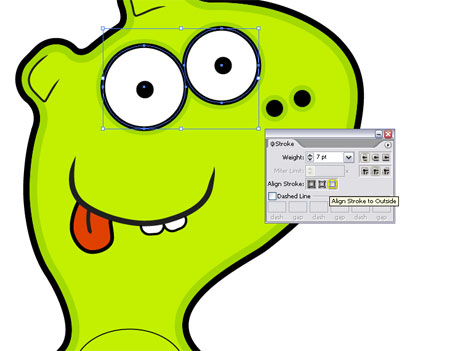
Adjust the thickness of the strokes, with the main outline being the thickest at 7pt.
Adjust the thickness of the eyes to 5pt, making them less than the main outline, but being important features they are still given prominence.
Begin adding colour by first creating a new layer underneath the vector lines. Use the Pen Tool to roughly draw around the complete outline of the character, paying attention not to stray out of the black area.
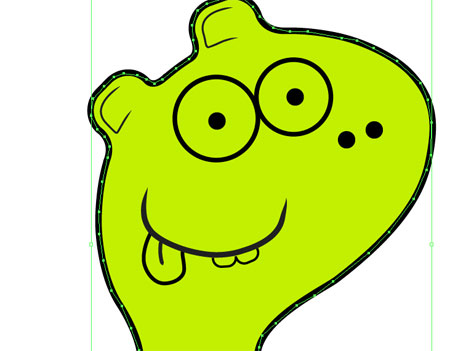
Fill the complete with a desired colour, this monster is a nice vibrant slimey green.
Some elements obviously don't want to be filled with green, such as the teeth, tongue and eyes. Use the same technique to add blocks of colour behind the lines.

The following is a technique I personally like to use on characters to give a nice little touch of depth and dimension.
Copy and paste in place (CTRL + F) the main outline strokes, go to Object > Expand and check the Stroke option.
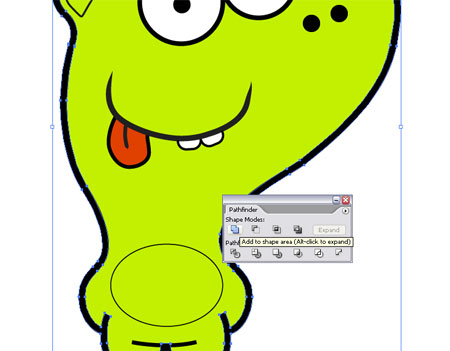
With all of the shapes of that make up the outline selected, merge them into one single shape using the Add to Shape Area option from the Pathfinder Tool.
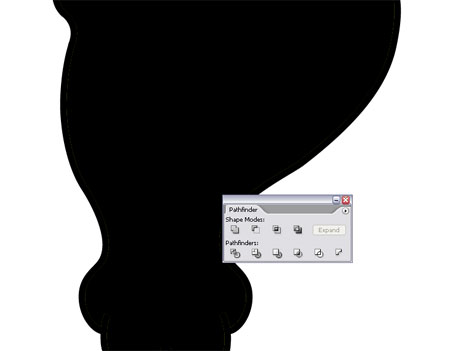
With the Direct Selection Tool, click on the outer path and press delete a couple of times to completely remove it. The result will fill the whole character area in black, but simply swap the Fill and Stroke checkboxes around.
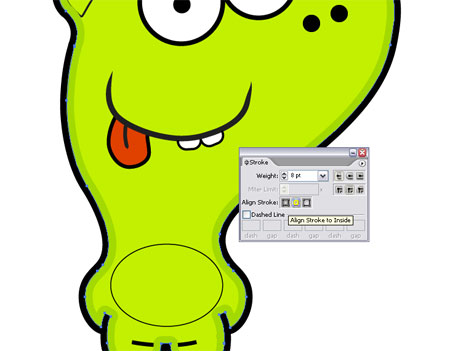
Swap the original black stroke for a darker green, bump up the weight and set the alignment to the Inside to give a simple shading effect to the character.
Select the facial features and add the same green stoke, this time aligned to the outline. Remember for objects such as the eyes that already have a stroke applied, simply Copy and Paste Behind (CTRL / CMD + B).

Add some extra shading to the eyes by drawing in the desired shape with the Pen Tool, concentrate on a smooth curve across the ear then roughly complete the path within the confines of the black outlines.

Adjust the order of the shading so that it is placed underneath the black outlines, hiding the rough edges of the path.
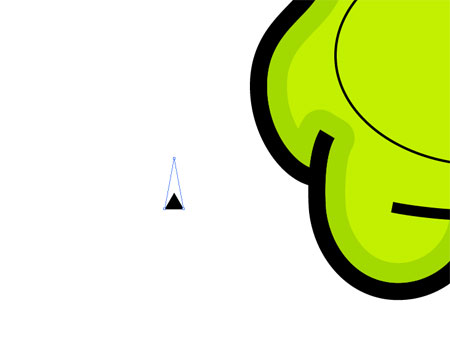
Using the Star Tool drag a triangle onto the artboard, reduce the points by pressing the down cursor key while dragging. Drag the uppermost point vertically with the Direct Selection Tool to stretch out the triangle a little.
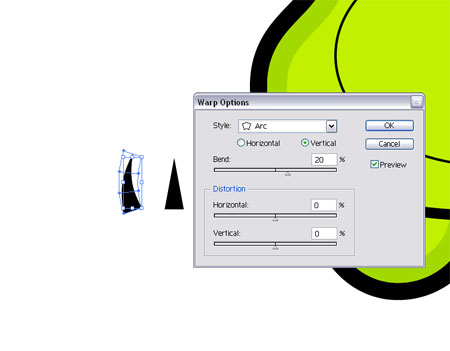
Duplicate the triangle and move slightly to the left, go to Object > Envelope Distort > Make with Warp and add a slight vertical Arc.
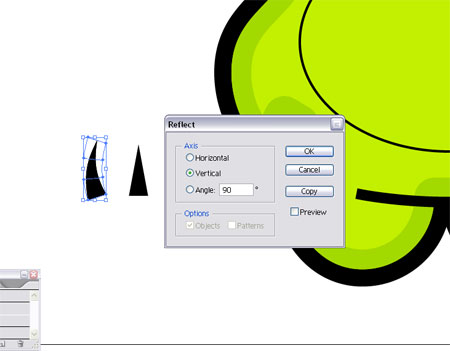
Duplicate this new curved triangle and head to Object > Transform > Reflect to create a mirror image.
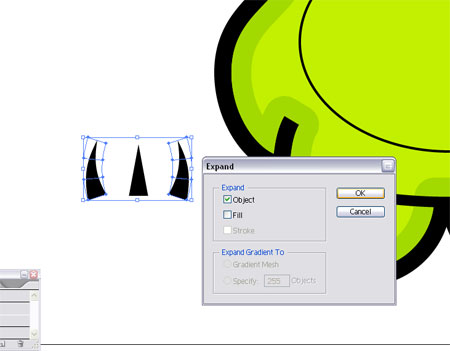
Go to Object > Expand and select Object to reset the Warped shapes into editable objects.
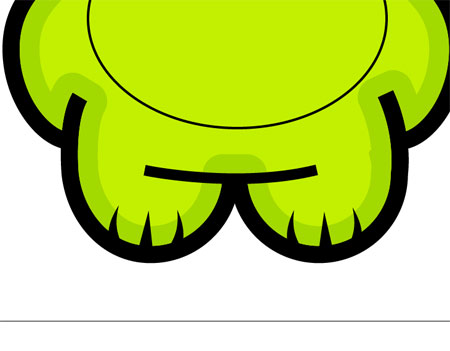
Position the groups of triangles in place as toes on the feet of the monster character.
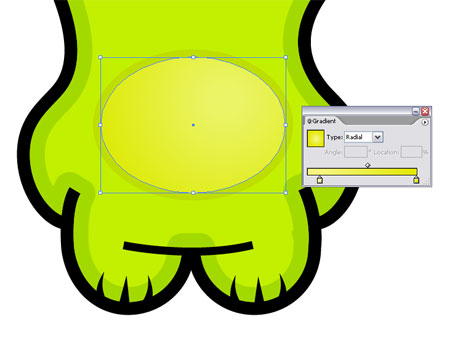
Let's work on the tummy area and add a little interest. Begin with a radial gradient and stroke with complimentary shades of green.
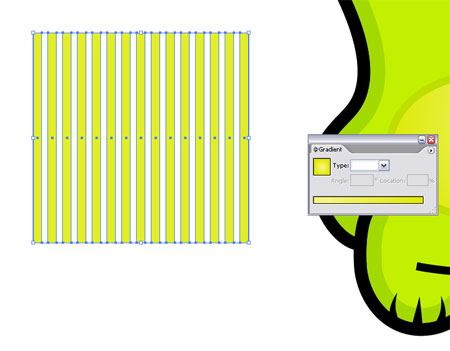
Draw a long thin rectangle, Copy and Paste in place (CTRL / CMD + F), then move to the right. Use the shortcut combinations of CTRL / CMD + F then CTRL / CMD + D to repeatedly paste and move an additional rectangle until a large group has been made. Group these together by clicking Object > Group.
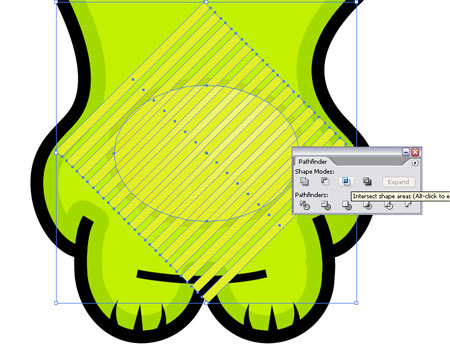
With both the group of rectangles and belly oval selected, use the Intersect from Shape Area option from the Pathfinder to trim out the excess rectangle. Press Expand to reset the shape.
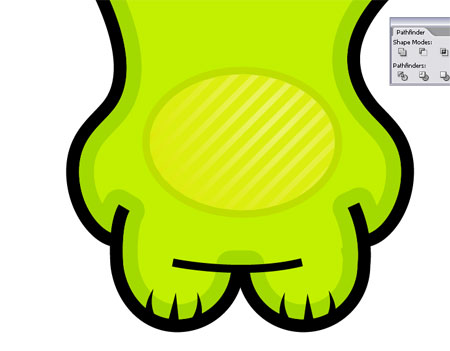
Adjust the colour, blending mode or transparency to suit. Here I use Soft Light to blend in the lines with the gradient.
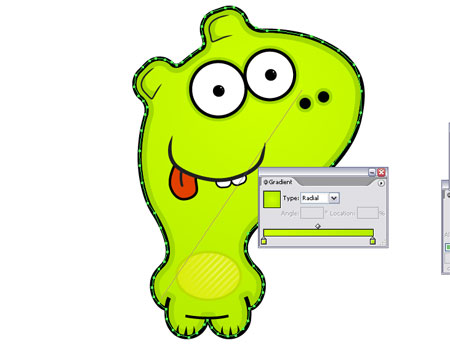
While working with gradients, drag a very slight gradient across the main body of the character to add a little variation in tone.
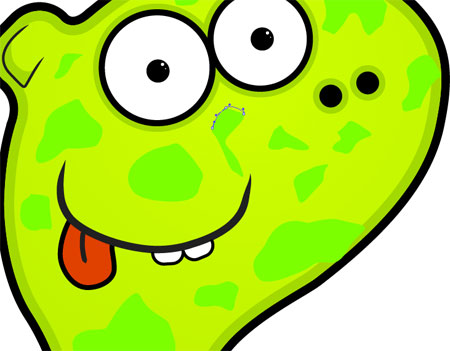
Using a random colour along with the Pen Tool roughly draw in some spots/scales across the whole body of the character.

Use the Magic Wand to select one of the scales, with them being the same colour all of the objects are selected together. Go to Object > Path > Simplify and adjust the settings to smooth out the shapes and remove any sharp angles.
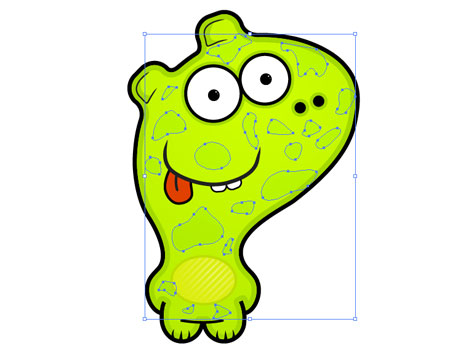
Adjust the colour, blending mode and transparency to blend in these scales. Keep them subtle enough to add a little texture to the character while not being too prominent.
That's one cute little monster character complete, now all that is needed is a name – any suggestions?

Why not combine this walkthrough with a previous Illustrator tutorial: Create a Blissful Vector Scene to create a nice home for your monster character!

Very well explained. This will no doubt be a valuable resource for MANY beginners in Illustrator. Looks like you put quite a bit of time into this one mate ;)
Great stuff! hehe made me chuckle, so that would be the name i’d choose. Chuckle.
Brilliant
Awww he is so cute. He needs some friends.
I knew I would learn something new if you did an illustrator tut. The tapered edges on the lines…My knowledge of illustrator is getting better every day.
Thanks Chris. Did you create the post in Dw after?
very good explained.
i’ll try that. thanks for this!
Wow, a great tutorial…and a truly scary monster vector or otherwise.
Great work and loved the walkthrough.
Cheers
Mike
its very nice.
thx i’ll try
very simple yet it rocks:)nice one chris
Great Tutorial, thanks
O wow! Surely it is so cuteeeeeeeeee ^_^. It is a he or a she? LOL well… just wanna give this cute monster a big hug.
Your tutorial is very well explained…and tells every details :) big thanks too
FLOATED and saved to my system hardisk :p
Gotta’ give this a try, great tutorial, and excellent results, thanks for the time youve put in to it.
Max | Design Shard
ooh! its so cute! you could name him… noodle. haha. its the only thing i could think of :D
Thanks for taking the time to do this, it’s a very good tutorial.
sweet tutorial… think he should be called mush…. i dont know why… just coz :)
Congragulation! Great stuff!
But ı can’t do this :) because ı havent got patience for doing it!
Ah very very good tuto ! Clap ²
Alway high level quality in your blog ;-)
man i wish i had a copy of illustrator …oh and some talent to go with it ;)
great tut!
looks so cute :P
this is not a good tutorial to be honest
i am a newbie and i had troubles following what is going on, it should have been more detailed explaination, like step to step, I think the person who wrote this got lazy and assumed that the reader knows it but they don’t, it’s so frustrating
hehehe, i thought this was going to be a 3-step tutorial, glad i was wrong :)
really great tutorial. thanks a lot!
This is the best illustrator tutorial I have come across. Great details and step by step instructions! I loved it. Thanks a lot for sharing with us :) I made one monster too…
http://www.flickr.com/photos/kanu85/2882449647/
Well done. I love this tutorial..very nice..
:O
wow this great… nice work from you. i give you 2 thumbs up. keep up the good work!
Thanks some very helpful tips in here for me getting to grips with illustrator
Awesome tutorial ! i have been following most of your vector tutorials and i’d say that all of them are amazing !!
thanks !
i think using livepaint and the paint bucket would be an easier way of filling in the large areas (the main green on the body, teeth, etc)
nice tutorial!
the sketch is very beautiful its very well explained thanks 4 explaining
Very informative…i just learned about your site and am going through it all, page by page. Awesome source of information…thank you.